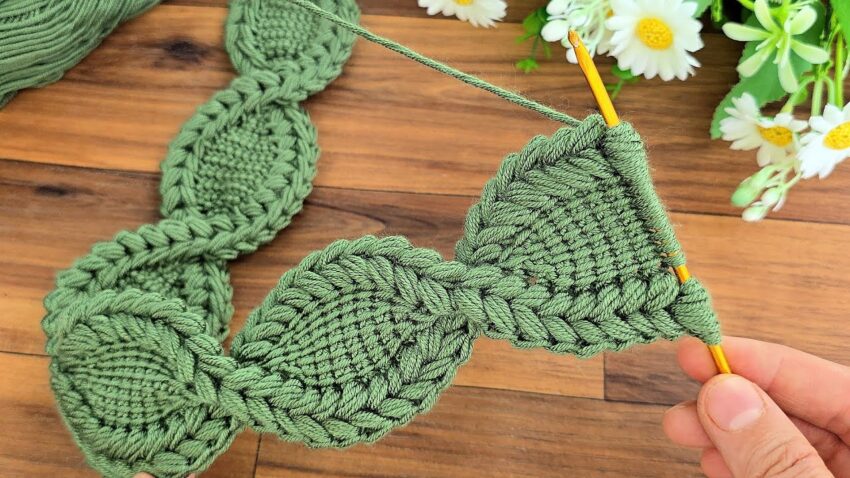
Here is a step-by-step tutorial for making the twisted leaf chain crochet pattern shown in your picture. This design is made of repeated oval/leaf motifs connected by twisting the chain between them.
🌿 TWISTED LEAF CHAIN – SUPER DETAILED TUTORIAL
⭐ PART 1 — FIRST LEAF
🔸 Round 1 — Foundation Oval
- Ch 10
(This makes a longer and smoother oval like your picture.) - SC in 2nd ch from hook
- SC in next 7 chains
→ You now have 8 SC in a row. - In last chain: 5 SC into the same stitch
(This forms the round tip of the leaf.) - Rotate your work to crochet on the other side of the starting chain.
- SC in next 7 stitches (down the opposite side)
- In the first chain: 4 SC into the same stitch
🟢 Total stitches ~ 24
You now have a smooth oval.

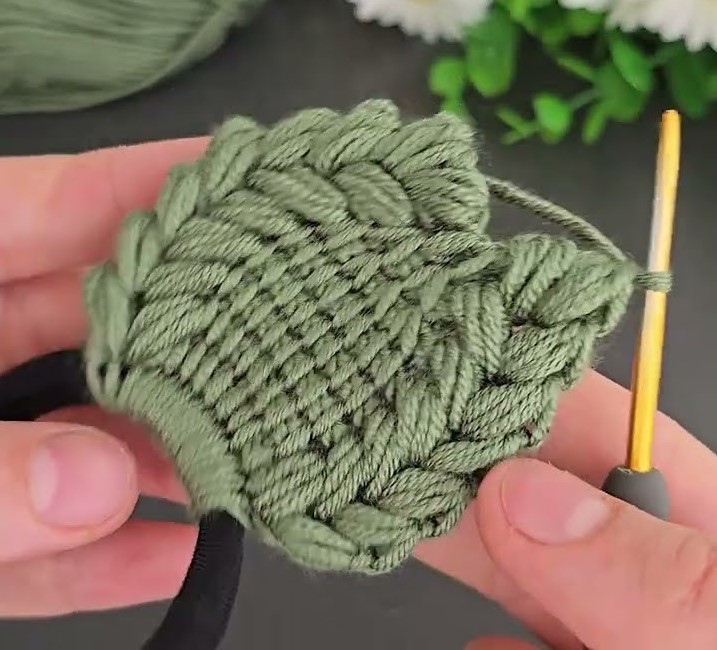
🔸 Round 2 — Building the Leaf Body
This round adds thickness.
- SC in next 8 stitches
- In next stitch (tip area):
- 2 HDC
- 2 DC
- 2 HDC
(6 stitches total into the same spot)
- SC in next 8 stitches
- In last stitch: repeat the tip pattern again:
- 2 HDC
- 2 DC
- 2 HDC
Your leaf is now puffy and long, like the ones in the picture.
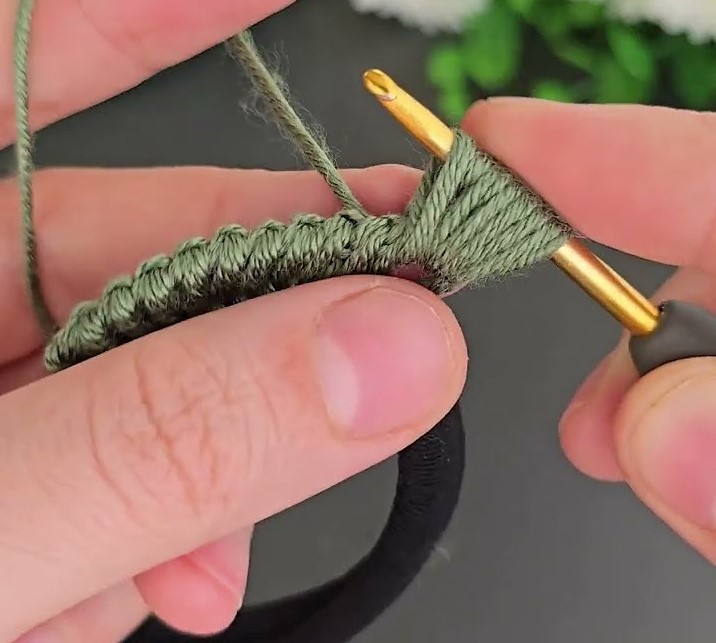
🔸 Round 3 — Rope-Like Braided Edge
The distinctive border comes from slip stitching in the front loop only.
- Sl St around the entire leaf
IMPORTANT: insert hook into the front loop only (FLO) of each stitch.
This creates the pretty braided edge.
Your first leaf is finished!
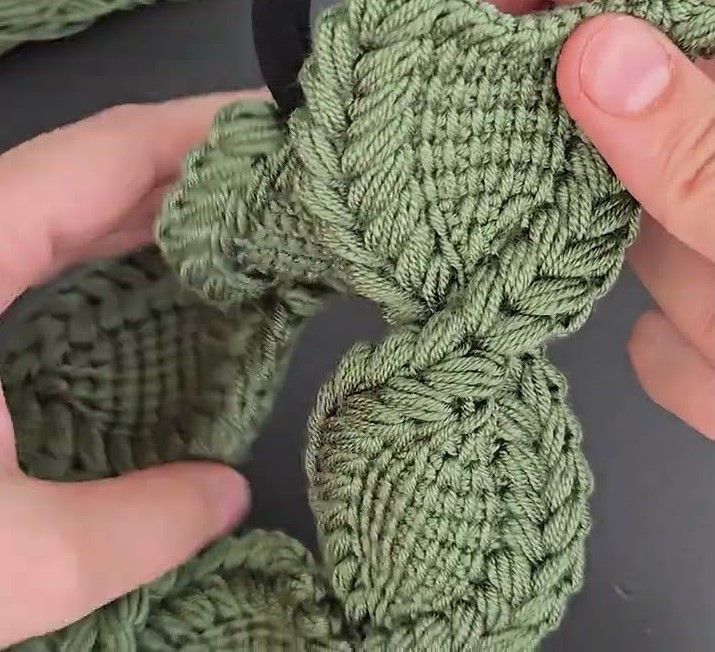
🌿 PART 2 — TWISTING & CONNECTING LEAVES
🔸 Between the Leaves
- After finishing the last Sl St of the leaf, Ch 6
- Hold the chain and twist it 1–2 times
(This makes the spiraling connector in the picture.) - Insert hook into the very first stitch of where you want the next leaf to begin.
- Sl St to join
Now begin the next leaf directly from this join.
🌿 PART 3 — SECOND LEAF (Same as Leaf 1)
Repeat the leaf pattern:
✔ Make foundation oval
- Ch 10
- SC 8
- 5 SC in last
- SC 7
- 4 SC in first
✔ Build leaf body
- SC 8
- (2HDC,2DC,2HDC) in tip
- SC 8
- (2HDC,2DC,2HDC) in base
✔ Add rope edge
- Sl St (FLO) around
✔ Make connector
- Ch 6 → twist → join → next leaf
Repeat as long as you want.
🌿 PART 4 — SIZE ADJUSTMENTS
Want bigger leaves?
- Start with Ch 12–14 instead of 10.
Want smaller leaves?
- Start with Ch 6–8.
Want thicker rope border?
- Use HDC or SC instead of slip stitching around edge.
🌿 PART 5 — USES
This pattern is perfect for:
- Bag straps
- Decorative borders
- Headbands
- Boho belts
- Table runners
- Curtain tiebacks
- Plant hanger decorations
- Garlands