
Sure! Here is a step-by-step tutorial so you can follow exactly what is happening in your photo.
🎄 Ultra-Detailed Tutorial: Crochet Candy-Stripe Mini Wreath
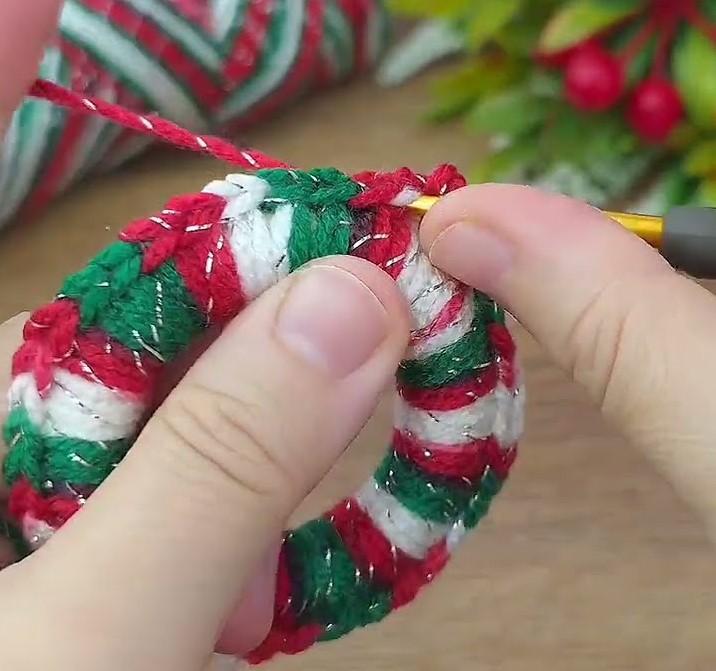
This matches exactly the technique shown in your image.
⭐ Materials
- 1 wooden ring (4–5 cm)
- Christmas yarn (red, white, green)
- Crochet hook size suitable for yarn (usually 3.0–4.0 mm)
- Scissors
- Yarn needle

🧶 Understanding the Technique in the Photo
This wreath is made using:
➤ Single crochet stitches worked around a wooden ring
This is not worked in rounds like normal crochet—
you crochet around the ring itself, pulling yarn from the back to the front.
➤ Color changes every few stitches
This makes the candy-stripe effect.
🍬 Step-by-Step Instructions (Very Detailed)
STEP 1 — Attach First Color
- Hold the wooden ring in your non-dominant hand.
- Place the yarn (let’s start with red) behind the ring.
- Insert the hook from front to back under the ring.
- Hook the yarn and pull it to the front → 1 loop on hook.
- Yarn over and pull through → single crochet made.
Tip: Pull this first stitch tight—it anchors everything.

STEP 2 — Work Single Crochets Around the Ring
Repeat:
- Insert hook front → back under the ring.
- Yarn over behind the ring.
- Pull yarn up to the front → 2 loops on hook.
- Yarn over → pull through both loops.
Each stitch wraps around the ring.
👉 Slide stitches together as you go.
They should be tight and touching—no space.
STEP 3 — Switch Colors (Exactly like the photo)
When you’re ready to change color:
- Do a normal SC until you have 2 loops left on the hook.
- Drop the old color (don’t cut it).
- Pick up the new color (e.g., white) and yarn over with it.
- Pull through both loops → color change completed.
Now continue single crocheting with the new color.
To get the exact look:
- Change color every 3 stitches
(Example: 3 red → 3 white → 3 green → repeat)
That makes the clean stripes shown in the photo.
STEP 4 — Continue Around the Ring
Keep crocheting:
- Insert hook under the ring
- Pull yarn up
- Make SC
- Slide stitches so they stay tight
Repeat color changes every 2–4 stitches depending on stripe thickness you prefer.
Continue until the wooden ring is fully covered.
STEP 5 — Closing the Circle
When you meet the first stitch:
- Insert hook into the first SC you made.
- Slip stitch with the working yarn color.
- Cut yarn, leaving a long tail.
- Pull through tightly.

STEP 6 — Weaving in Ends
With a yarn needle:
- Bring all tails to the back of the wreath.
- Weave them around stitches inside the ring.
- Trim excess yarn.
🌟 Optional Decorations
You can add:
🎀 Tiny bow
✨ Glitter yarn wrap
🔔 Small bell
🧵 Ribbon loop for hanging