
Here’s a step-by-step tutorial for making the crochet square shown in your picture — this style is often called a Popcorn Puff Flower Square or 2-Color Puff Granny Square.
The design uses white as the main color and orange as the puff color.
🌼 DETAILED PUFF-GRANNY SQUARE TUTORIAL
🧶 Materials
- Main color (MC): White
- Contrast color (CC): Orange
- Hook: 3.5–4.0 mm
- Scissors and yarn needle

🧵 Stitch Guide
Puff Stitch (PS)
- Yarn over (YO)
- Insert hook into stitch/space
- Pull up a long loop (same height as a dc)
- Repeat YO + pull up loop 3 more times
→ You now have 9 loops on the hook - YO and pull through all loops
- Ch 1 to lock the puff closed
(You can do 3 or 4 repeats depending on how puffy you want it.)
🟩 ROUND 1 — Center (White)
- Make a magic ring.
- Ch 3 (counts as DC).
- Work into the ring:
- 1 dc, ch 1 → repeat 7 times
- You should have 8 dc groups separated by 8 ch-1 spaces.
- Pull ring tight.
- Sl st into top of beginning ch-3 to join.
✔ Done: A circle with 8 spaces.
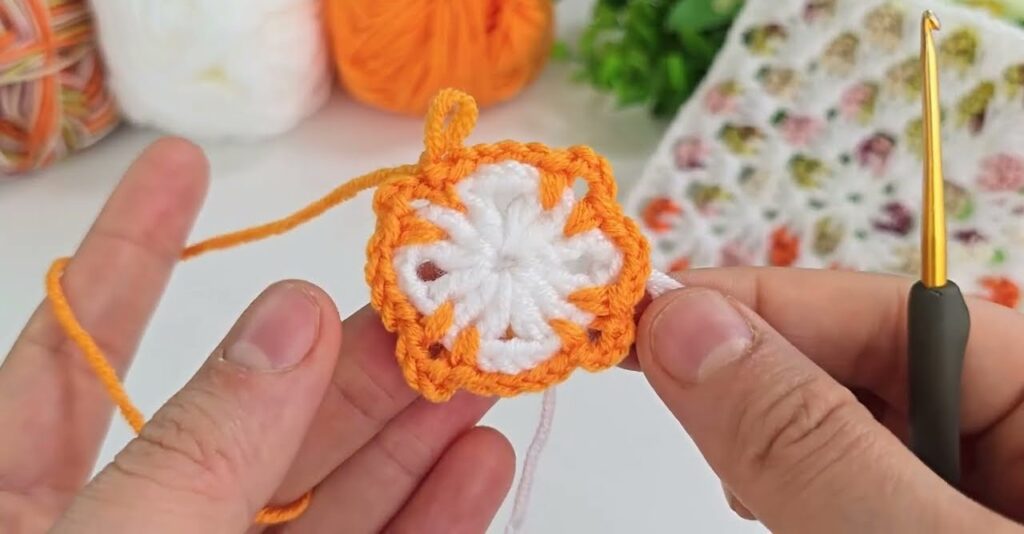
🟧 ROUND 2 — First Puff Round (Orange)
- Attach orange yarn in any ch-1 space.
- Ch 1 (does NOT count).
- In the same space, make:
- 1 Puff Stitch + ch 1
- In each of the remaining 7 ch-1 spaces:
- 1 Puff Stitch + ch 1
- Join with sl st to top of the first puff’s closing chain.
- Fasten off orange.
✔ Done: A ring of 8 orange puffs.
🤍 ROUND 3 — Turning Circle into Square (White)
Attach white yarn in any space between two puff stitches.
We will create 4 corners.
Corner:
2 dc, ch 2, 2 dc (all into the same space)
Sides:
2 dc into each space between puffs
Work around like this:
- Side space 1: 2 dc
- Corner space: 2 dc, ch 2, 2 dc
- Side space: 2 dc
- Corner
- Continue same pattern
- Sl st to join at end
✔ Done: You now have a square shape with 4 corners.
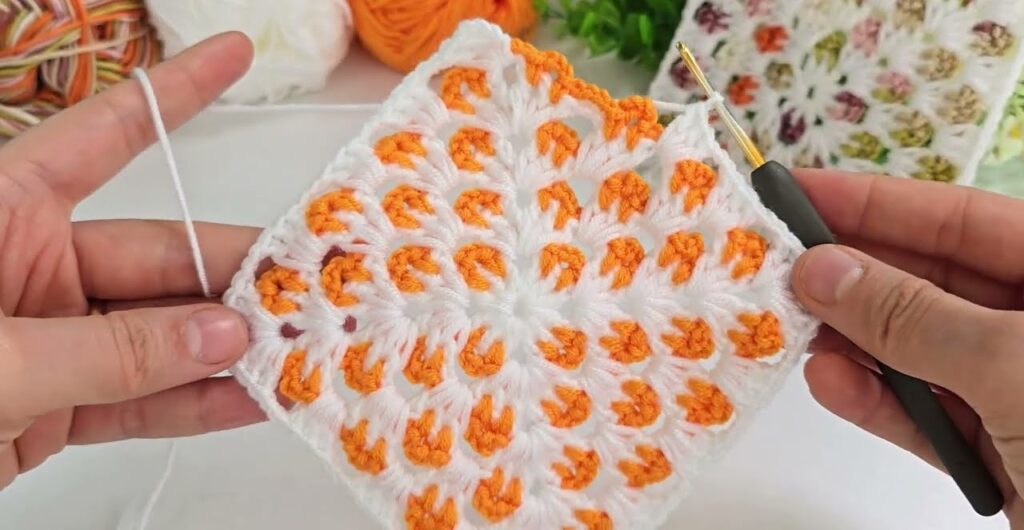
🟧 ROUND 4 — Second Puff Round (Orange)
You will place puffs only in the side spaces, never in corners.
- Attach orange into any side space.
- Ch 1.
- In each side space:
- 1 Puff + ch 1
- Skip the corners entirely.
- Go all around the square.
- Sl st to join and fasten off.
✔ Done: A square with orange puffs placed between white clusters.
🤍 ROUND 5 — White DC Expansion Round
This repeats the same structure as Round 3 but is now larger.
Corners:
2 dc, ch 2, 2 dc
Sides:
Work 2 dc into each ch-1 space between puff stitches
Continue:
- Side → Corner → Side → Corner
- All the way around
- Sl st to join
✔ Done: Square gets bigger.
🟧 ROUND 6 — Third Puff Round (Orange)
Exactly like Round 4:
- Attach orange in a side space.
- Work 1 Puff + ch 1 into every side space.
- Skip corners.
- Join and fasten off.
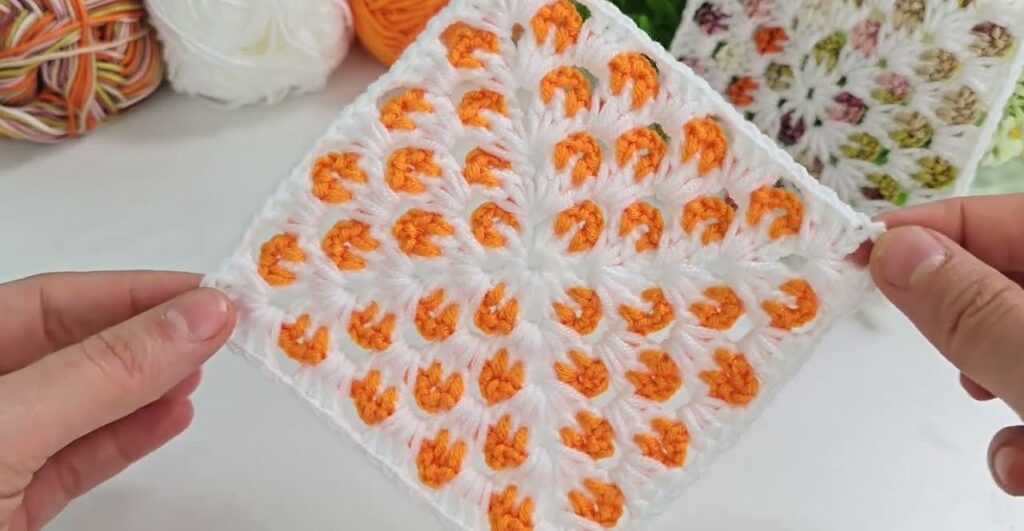
🤍 ROUND 7 — White Border (Optional)
To finish your square neatly:
Corners:
- 2 dc, ch 2, 2 dc
Sides:
- 2 dc in each side space
OR - 3 dc in each space for a thicker border
Join and fasten off.
🎉 Finished!
You now have the same puff granny square with alternating white rounds + orange puff rounds.