Here is a step-by-step pattern so you can make the flower exactly like the photo.
I’ll include stitch counts, loop heights, placements, and clear instructions.
🌼 PUFF PETAL FLOWER — FULL DETAILED PATTERN
Materials
- 3.0 mm crochet hook
- 3 colors of yarn:
- Green (center + border)
- Yellow (inner petals)
- White (outer petals)
Stitches used
- ch = chain
- sl st = slip stitch
- sc = single crochet
- dc = double crochet
- puff stitch = YO, insert hook, pull up loop (repeat 3–5 times), YO, pull through all loops

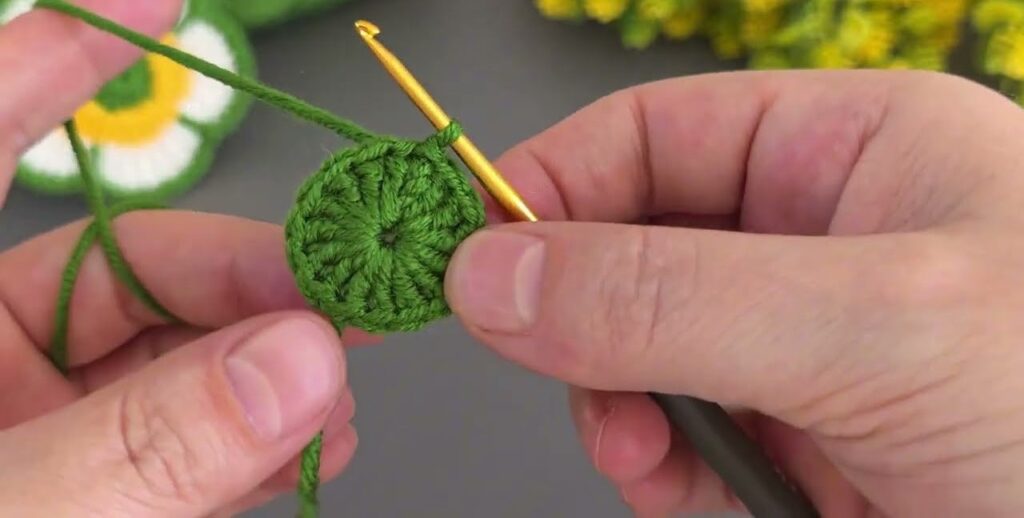
⭐ ROUND 1 — Green Center
Goal: make the flat center circle
- Make a magic ring.
- Ch 2 (does NOT count as a stitch).
- Inside ring, make 12 dc.
- Pull ring tight.
- Sl st into first dc to close.
➡ You now have 12 stitches.
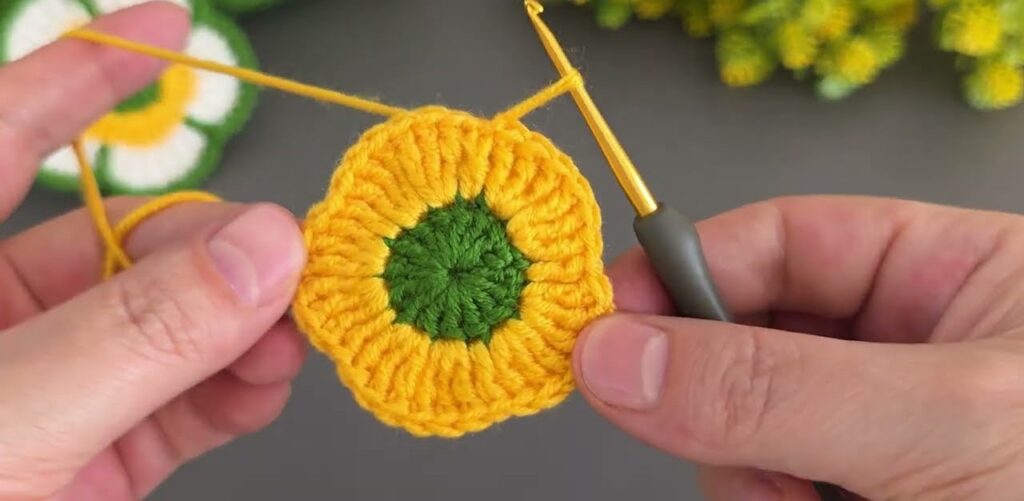
⭐ ROUND 2 — Yellow Inner Puffy Ring
This creates 12 small puff stitches around.
Puff stitch height: normal (not too tall)
- Attach yellow yarn into any stitch.
- Ch 1.
- Into SAME stitch:
- Make 1 puff = (YO, insert, pull up loop × 3), then YO pull through all loops.
- Ch 1.
- Move to next stitch:
- 1 puff + ch 1
- Repeat around 12 times (one puff in each dc).
- Sl st into top of first puff.
➡ You should now have:
✔ 12 yellow puff stitches
✔ 12 chain-1 spaces between them
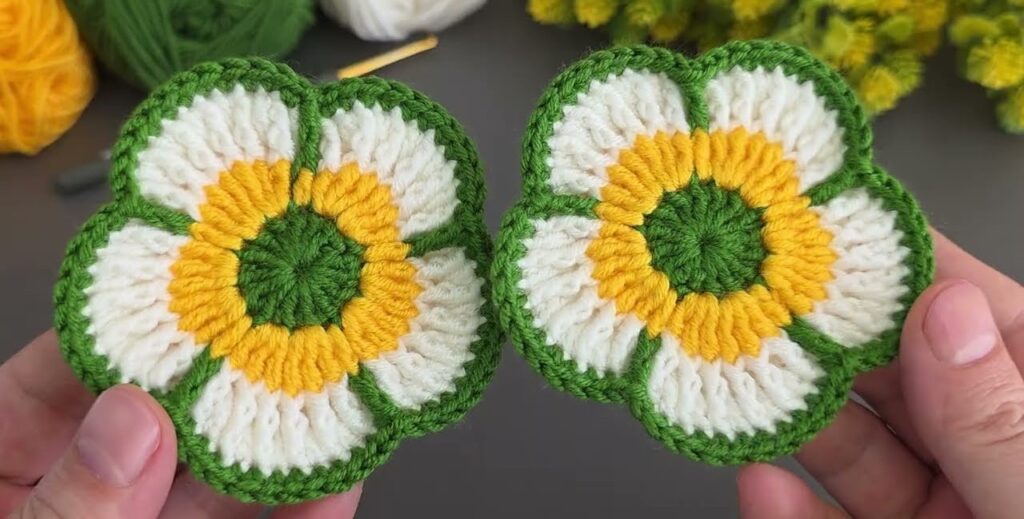
⭐ ROUND 3 — White Outer Petals
Important: Each petal uses two yellow chain spaces.
White puff stitches = tall
→ Pull loops up to ~1.5 cm so petals look fat and full.
Start
- Attach white yarn into ANY yellow ch-1 space.
- Ch 1.
Petal instructions (repeat 5 times)
Each petal is made across two yellow spaces.
In the first yellow space:
- Make 6 tall puffs
(YO, pull up long loop × 4 repeats per puff → then close)
In the next yellow space:
- Make 6 tall puffs again
This makes one huge puffy petal.
Once the petal is done:
- Sl st into NEXT yellow space (this creates the dip between petals).
- Skip that space for puff work.
Summary
For each petal:
- 6 tall puffs in space A
- 6 tall puffs in space B
- sl st in space C (between petals)
Repeat until you have 5 petals.
⭐ ROUND 4 — Green Border / Petal Shaping
This round defines the edges and makes the flower look like the photo.
Start
- Attach green yarn at the top center of any petal.
- Ch 1.
Work around each petal
- Make 12–14 sc evenly across the curved top.
(sc into the tops of the white puffs; do NOT work too deep)
Between petals
- When you reach the dip between 2 petals, make:
- 1 sl st down into the dip
- then immediately move up to the next petal
Repeat for all 5 petals.
End
- Sl st to beginning sc.
- Fasten off and weave ends.
➡ Now the flower has the exact green outline seen in your picture.
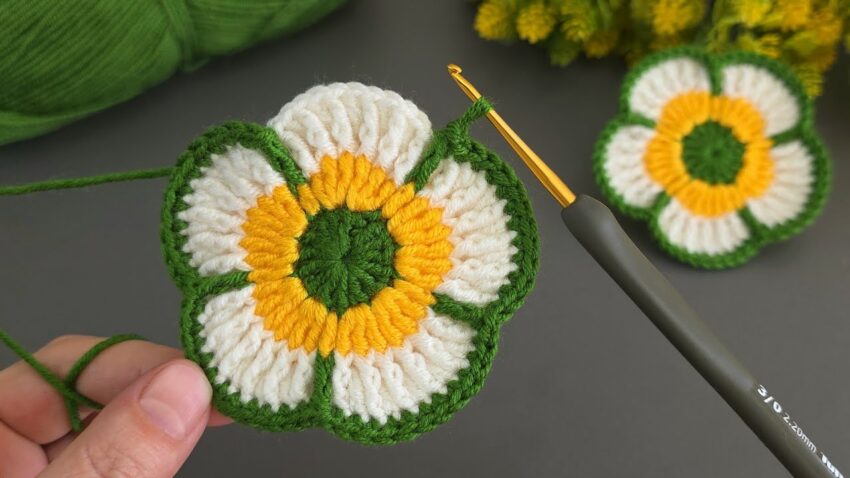
🌼 You’re done!
Your flower should now look exactly like the photo —
a puffy center, yellow middle, and big white petals outlined in green.