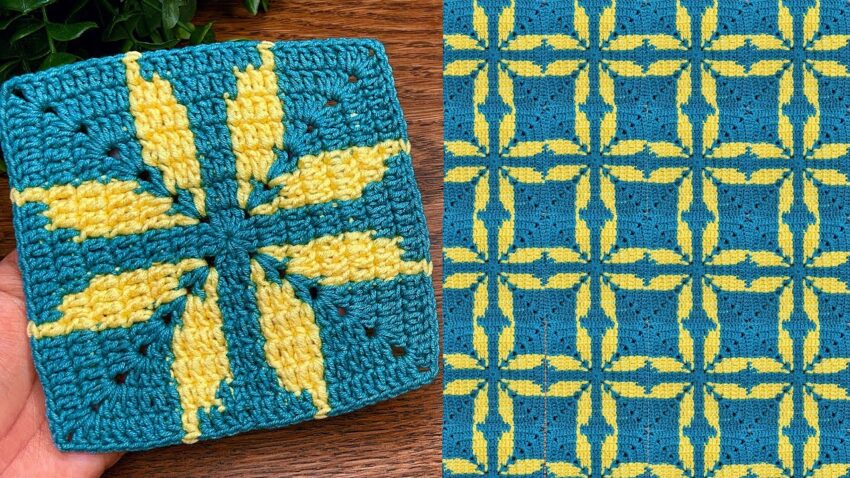
Here is a clear step-by-step guide to help you make the crochet square shown in your picture. This pattern is created using overlay mosaic crochet / overlay colorwork in the round. The yellow sections are overlay front-post stitches worked over a teal background.
⭐ CROCHET STARBURST MOSAIC SQUARE — FULL DETAILED PATTERN
Finished size
≈ 15–16 cm (6”) depending on yarn and tension.
Yarn
- Color A = Teal
- Color B = Yellow
Hook
4.0–5.0 mm
🧶 STITCHES / ABBREVIATIONS
- MR = magic ring
- ch = chain
- sc = single crochet
- dc = double crochet
- tr = treble crochet
- FPtr = front post treble crochet around a stitch in a lower round
- sl st = slip stitch

📌 READ THIS BEFORE STARTING
- The teal background is worked normally in rounds.
- The yellow “petals” are made using front post treble stitches (FPtr) that reach 2–4 rounds below.
- Every FPtr always replaces 1 dc stitch, so stitch counts stay the same.
- Corners are always: (dc, ch 2, dc).
🌟 ROUND-BY-ROUND PATTERN
ROUND 1 — Center Circle (Teal)
- MR
- ch 2 (counts as dc), 15 dc into ring (16 total)
- Join with sl st.
ROUND 2 — Increase (Teal)
- ch 2
- 2 dc in each stitch (32 dc)
- Join.
ROUND 3 — Square Shaping Begins (Teal)
This creates 4 corners.
- ch 2
- dc in next 7 sts, (dc, ch 2, dc) in next st → corner
- Repeat 3 more times
- Join.
You now have a teal square.
ROUND 4 — Start Yellow Petals (Yellow)
This is where the yellow “X” begins.
Attach Yellow in any corner ch-2 space.
Each side:
- sc in corner
- sc in next 3 sts
- FPtr around the dc in Round 1 that lies directly below (center area)
- sc in next 3 sts
- sc in corner ch-2 space
Repeat around.
You now have 4 yellow post stitches, one on each side.
ROUND 5 — Extend Yellow Petals (Yellow)
The yellow “petals” grow longer.
- ch 1
- sc until you reach the previous round’s FPtr
- Work a new FPtr BELOW it, into a dc of Round 1 again, but slightly farther outward
(these two FPtr should stack, forming a straight yellow line) - Continue sc across the rest of the side
- sc in each corner
Repeat around.
You should now see two stacked yellow stitches on each side.
ROUND 6 — Build Base Back Up (Teal)
Return to teal to stabilize the square.
- Join teal
- dc around
- Corners: (dc, ch 2, dc)
- IMPORTANT:
Work your dc over the yellow FPtr, do not work into them.
ROUND 7 — Long Petals (Yellow)
This is the dramatic starburst part.
On each side:
- sc across
- When you hit the center of the side, work 3 long FPtr:
- 1 FPtr into Round 4 FPtr base (shortest)
- 1 FPtr into Round 3 dc
- 1 FPtr into Round 1 dc (longest)
These form the tapered yellow “leaf shapes”.
- sc rest of the side
- sc in corners
Repeat.
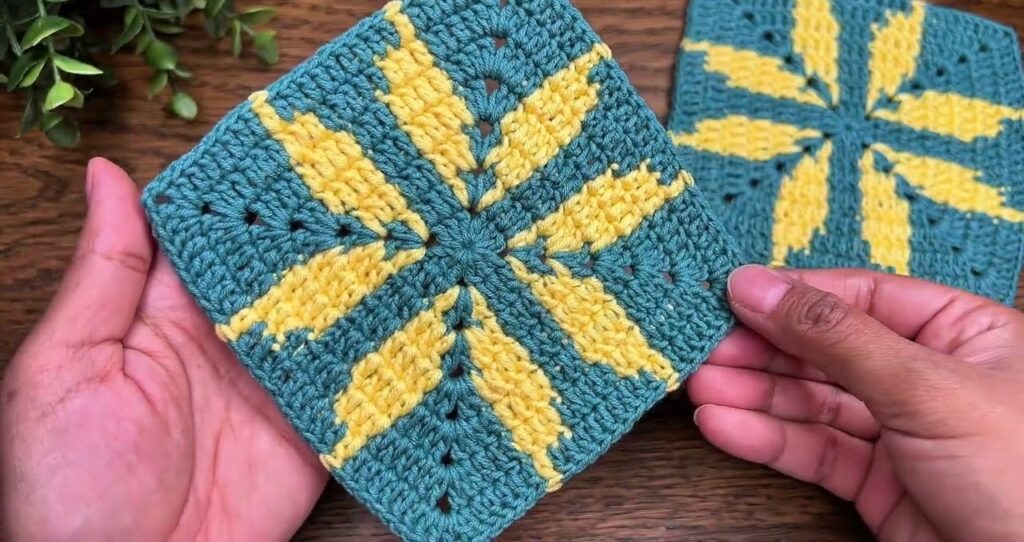
You now have the exact 3-layer yellow petal look in your photo.

ROUND 8 — Teal Frame (Teal)
- dc around
- Corners: (dc, ch 2, dc)
- Work over all yellow post stitches.
ROUND 9 — Final Teal Edge (Teal)
- dc around
- Corners: (dc, ch 2, dc)
- Join and fasten off.
⭐ BLOCK YOUR SQUARE
Pin and steam/lightly block to make it perfectly flat and square.
Done!
You now have the identical square as in your picture.