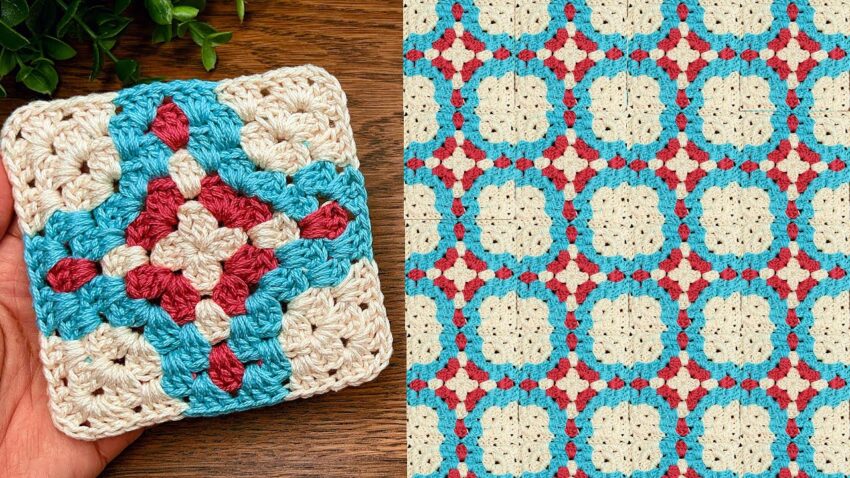
Perfect 💕 step-by-step crochet tutorial so you can easily follow and recreate the exact square pattern shown in the picture (the red–blue–cream mosaic granny square).
🧶 Materials
- Yarn: 3 colors of worsted weight (4) yarn
- Color A: Cream (background)
- Color B: Red (center diamond)
- Color C: Blue (outline)
- Hook: 4 mm (G/6)
- Notions: Scissors, yarn needle

🪡 Stitches & Terms (US Crochet Terms)
| Abbreviation | Meaning |
|---|---|
| ch | chain |
| sl st | slip stitch |
| sc | single crochet |
| dc | double crochet |
| sp | space |
| st | stitch |
| cl | cluster (3 dc in same space) |
Each cluster = 3 double crochets in the same space.
🧩 Pattern Instructions
We’ll build this square in 6 rounds, then you can repeat and join them for a blanket or other project.
🌸 Round 1 – Center Diamond (Color B: Red)
- Make a magic ring (or ch 4, join with sl st to form ring).
- Ch 3 (counts as dc), make 2 dc in ring, ch 2.
- (3 dc, ch 2) — repeat 3 more times (you’ll have 4 clusters total, separated by ch-2 corners).
- Join with sl st to the top of the starting ch-3.
- Fasten off Color B.
🧶 Tip: You should have a tiny red square with 4 clusters and 4 corner spaces.
🌼 Round 2 – Background Layer (Color A: Cream)
- Attach Color A in any corner ch-2 sp.
- Ch 3 (counts as dc), 2 dc in same sp, ch 1.
- (3 dc, ch 2, 3 dc, ch 1) in the next corner — this forms the next side and corner.
- Repeat around.
- Join with sl st to top of ch-3.
- Fasten off.
🧶 Result: The red diamond is now bordered by cream clusters with clear corners forming a larger square.
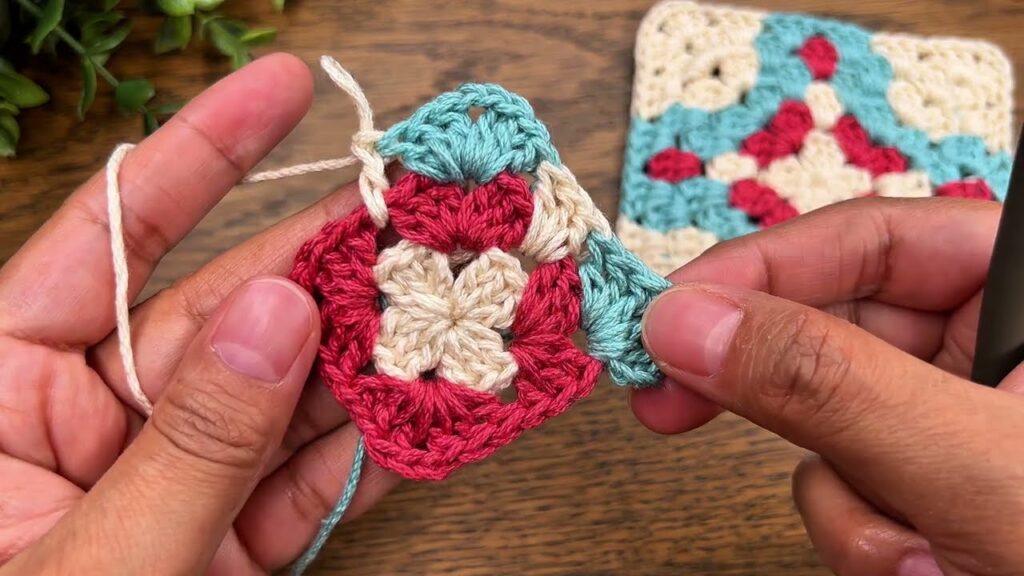
💎 Round 3 – Outline Accent (Color C: Blue)
- Join Color C in any corner ch-2 space.
- Ch 3, 2 dc in same corner, ch 1, 3 dc in same corner (corner made).
- Ch 1, 3 dc in next ch-1 space — work across the side.
- Repeat (corner + side) pattern around:
- Corner = (3 dc, ch 2, 3 dc)
- Side = (ch 1, 3 dc in next space)
- Join with sl st, fasten off.
🧶 Result: Blue outlines appear, framing the red diamond.
☁️ Round 4 – Expanding the Background (Color A: Cream)
- Join Color A in any corner space.
- Ch 3, 2 dc, ch 2, 3 dc in same corner.
- (Ch 1, 3 dc in next ch-1 sp) — repeat along the side.
- Work (3 dc, ch 2, 3 dc) in each corner.
- Join with sl st to top of ch-3.
- Fasten off.
🧶 Result: The cream color widens the background, spacing out the blue outlines.
🔺 Round 5 – Red Cross Details (Color B: Red)
This forms the red “X”/diamond shape in the middle of each side.
- Join Color B in the middle of any side cluster (not a corner).
- Work (3 dc, ch 1) into that space — this makes one point of the diamond.
- Skip next cluster and move to the next middle space, (3 dc, ch 1) again.
- Repeat around forming four red points crossing diagonally.
- Join with sl st and fasten off.
🧶 Result: Now you have a red diamond pattern extending through the blue outlines.
🌊 Round 6 – Blue Final Border (Color C: Blue)
- Join Color C in any corner.
- (3 dc, ch 2, 3 dc) in corner.
- Along each side: (ch 1, 3 dc in next ch-1 space) repeat until next corner.
- Join with sl st, fasten off.
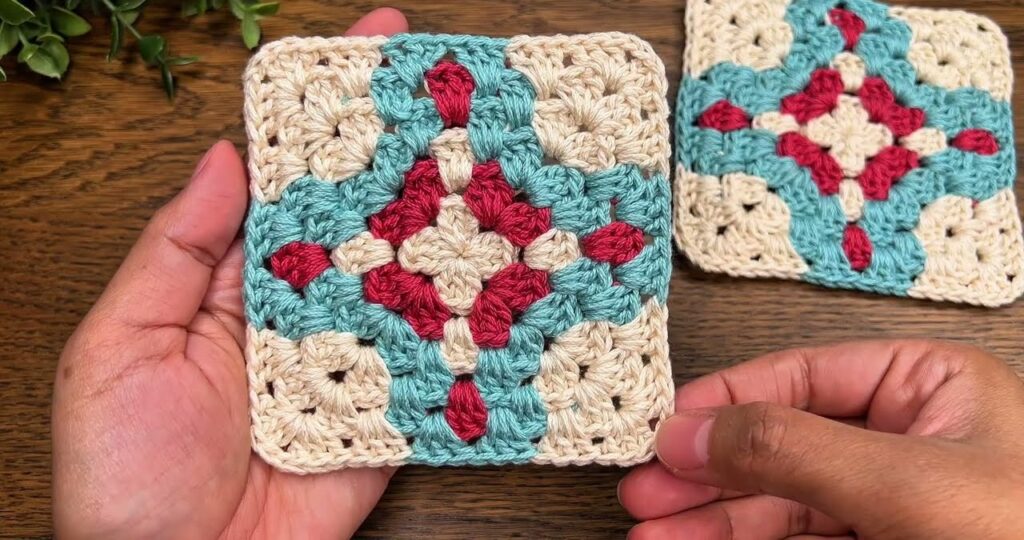
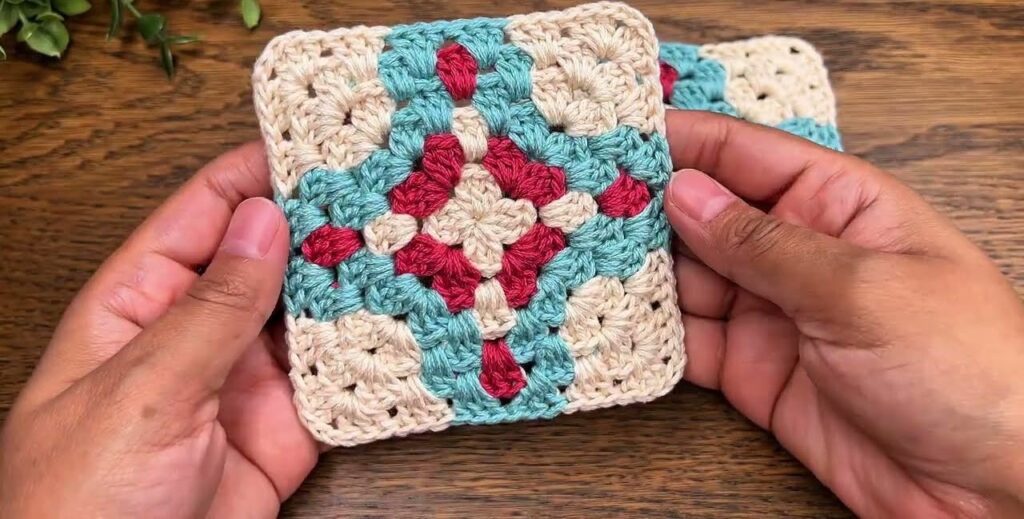
🧶 Result: You now have one complete square matching the photo.
🔗 Joining the Squares
You can make many of these and join them together using one of the following:
- Join-As-You-Go (JAYG): Work the final blue round while connecting new squares to the previous ones through ch spaces.
- Whip Stitch Join: Use yarn needle and Color C to sew squares together edge-to-edge.
- Slip Stitch Join: Use hook and slip stitches along the back loops of edges.
✨ Optional: Border for Finished Piece
After joining all squares:
- Work 2–3 rounds of cream (Color A) clusters all around.
- Add 1 final round of blue for a clean border.