step-by-step instructions, with exact stitch counts and how to form the color blocks so your squares match the picture perfectly.
✅ Pattern Overview
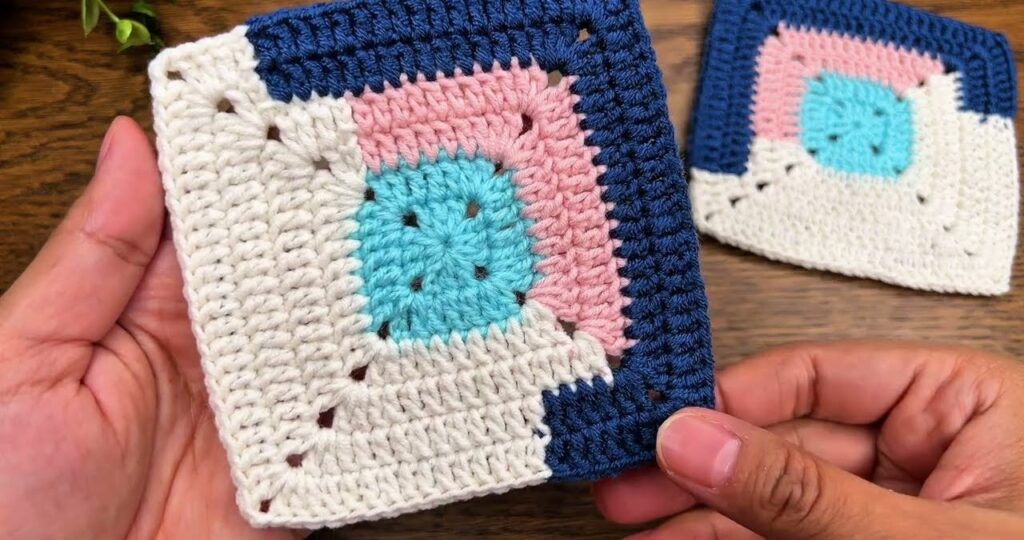
This blanket is made from granny squares where each round is a different color forming a diagonal color change.
Each square has:
- Round 1: Light Blue (center)
- Round 2: Cream/White (first ring)
- Round 3: Pink (second ring)
- Round 4: Navy Blue (final border and join color)

✨ Before Starting
Stitch Definitions (US Terms)
| Symbol | Meaning |
|---|---|
| ch | Chain |
| sl st | Slip stitch |
| dc | Double crochet |
| sp | Space |
| ch-2 corner | A chain 2 corner space |
How Granny Corners Work
Each corner is always:
(3 dc, ch 2, 3 dc)
Each side space is:
3 dc
🟦 Make ONE Square (Detailed)
Round 1 – Light Blue Center
- Make magic circle
- ch 3 (counts as 1 dc)
- Work 2 dc into ring
- (3 dc, ch 2) → repeat 3 times more
- Pull ring tight
- sl st to top of starting ch 3
- Fasten off light blue
You now have 4 clusters of 3 dc separated by 4 ch-2 corners.
Round 2 – Cream / White
Attach cream yarn in any corner ch-2 space.
In each corner:
(3 dc, ch 2, 3 dc)
On each side:
There is no side space yet, so skip directly to next corner.
Work this around the square, sl st to finish, fasten off.
Your square is now slightly larger.
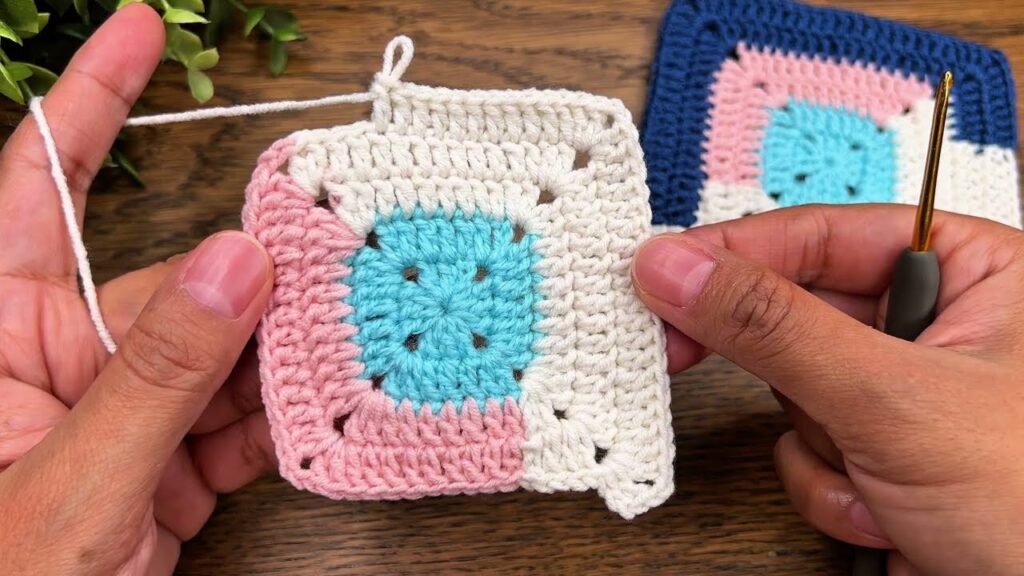
Round 3 – Pink
Attach yarn to ANY corner (does not matter which, the color order shows visually, not structurally).
Now the square has side spaces.
Work:
- Corners: (3 dc, ch 2, 3 dc)
- Side spaces: 3 dc
Work around the square, sl st, fasten off.
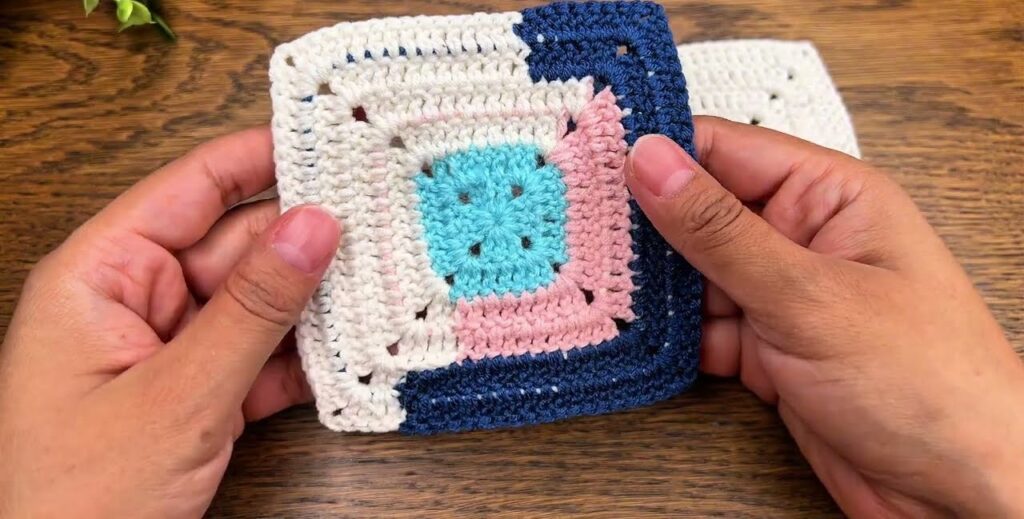
Round 4 – Navy Blue (Border)
Attach navy in any corner.
Work the same as before:
Corners:
(3 dc, ch 2, 3 dc)
Sides:
3 dc in each space along the side
✅ You now have one finished square.
🧵 How to Make the Diagonal Color Look
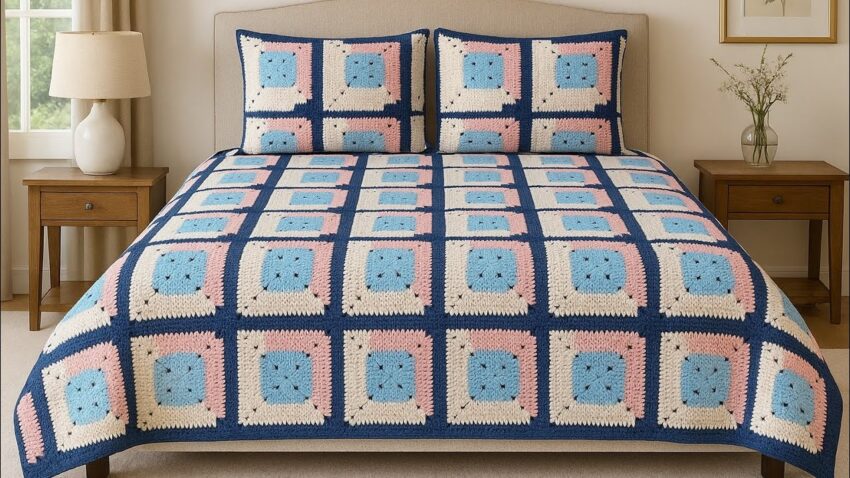
The picture shows each square with color blocks that look like they are placed diagonally.
This happens because:
- Round 2 is always the same color (white)
- Round 3 is always pink
- Round 1 is always blue
So no changing order is needed.
The “diagonal” effect comes naturally just by stacking rounds.
🔗 Joining Squares (Very Clean & Flat)
Use Navy Blue when joining.
Method: Slip-Stitch Join
- Lay two squares front sides together
- Insert hook through outer loops only of both stitches
- sl st across until entire edge is joined
- Repeat square-by-square to form full rows
- Then join rows to each other the same way
This creates neat straight lines, like the photo.
🛏 Blanket Layout Example (Twin/Single Bed)
To match the picture:
| Measurement | Number of Squares |
|---|---|
| Width | 7 squares |
| Length | 9–10 squares |
Pillows
- Each pillow front = 6 squares (2 × 3)
- Pillow back = plain fabric or 6 more squares
🧶 Yarn Estimate (Approximate)
For a single-bed size blanket:
| Color | Amount |
|---|---|
| Light Blue | 300–400g |
| Cream/White | 500g |
| Pink | 300–400g |
| Navy Blue | 700–900g (used for borders + joining) |
🌼 Finishing Border (around whole blanket)
With navy blue:
Round 1: dc all around the edge, placing
(3 dc, ch 2, 3 dc) in each blanket corner
Round 2 (optional scallop):
*Skip 1 stitch, 5 dc in next st, skip 1 stitch, sl st in next stitch*
Repeat around