
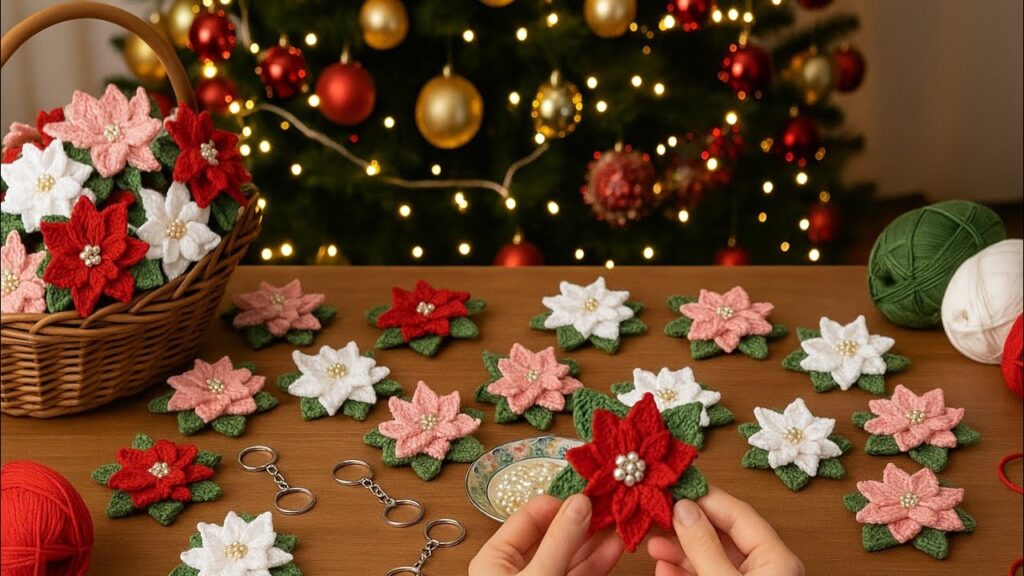
Perfect 🌸 step-by-step crochet tutorial for these beautiful poinsettia flowers including petals, leaves, assembly, and how to turn them into ornaments or keychains.
🎄 Crochet Poinsettia Flower (Detailed Tutorial)
🧶 Materials Needed
| Item | Details |
|---|---|
| Yarn | 3 colors — Red, White, or Pink (for petals); Green (for leaves); Yellow or Gold (for center) |
| Hook | 2.5 mm – 3.0 mm crochet hook |
| Others | Yarn needle, scissors, pearl beads, hot glue gun or needle & thread, keychain rings (optional) |
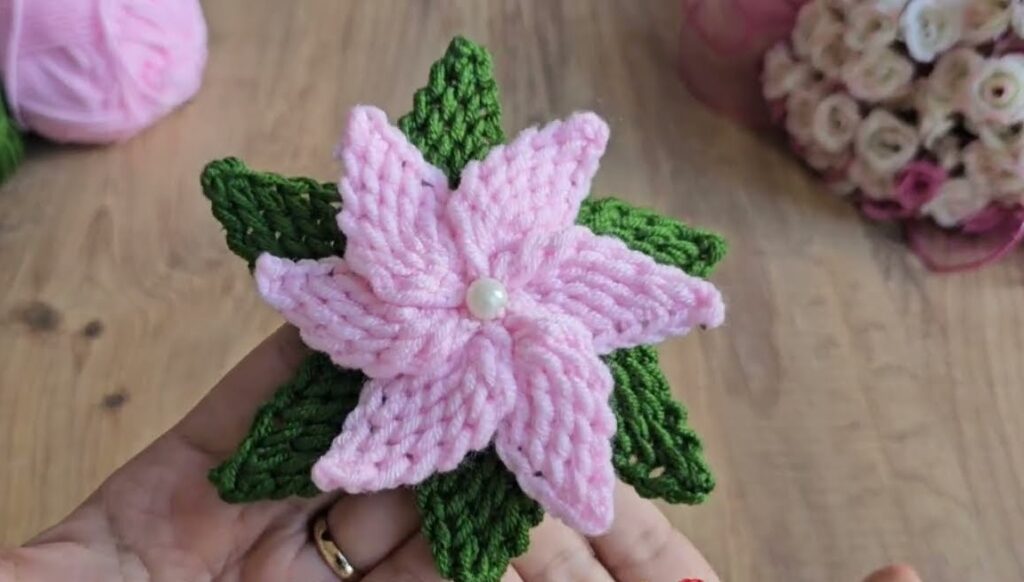
🌺 PART 1: Crochet Flower Center
- Start with yellow yarn (or golden).
- Make a magic ring.
- Inside the ring:
- Chain 1.
- Crochet 6 single crochets (sc) into the ring.
- Pull the ring tight.
- Slip stitch (sl st) to the first sc to close the round.
- Cut the yarn and fasten off.
→ You’ll have a small yellow circle.
🌸 PART 2: Back Petal Layer (Bottom Petals)
- Attach red, white, or pink yarn to the center ring.
- Chain 1.
- Round 1:
- (Chain 5, skip next stitch, slip stitch in next stitch) — repeat 6 times total.
- You’ll have 6 chain-5 loops around the center.
- Round 2 (forming petals):
In each chain-5 loop, crochet:sc, hdc, 3 dc, hdc, sc(sc = single crochet, hdc = half double crochet, dc = double crochet) - Slip stitch to the first petal to close.
→ This forms the back layer of 6 large petals.
🌼 PART 3: Front Petal Layer (Top Petals)
- Attach yarn between the petals of the back layer (into the base between petals).
- Round 3:
- Chain 5, slip stitch between the next two petals — repeat all around to make 6 loops.
- Round 4:
In each loop:sc, hdc, 3 dc, hdc, sc - Slip stitch to close and fasten off.
→ You’ll now have a double-layer poinsettia flower.
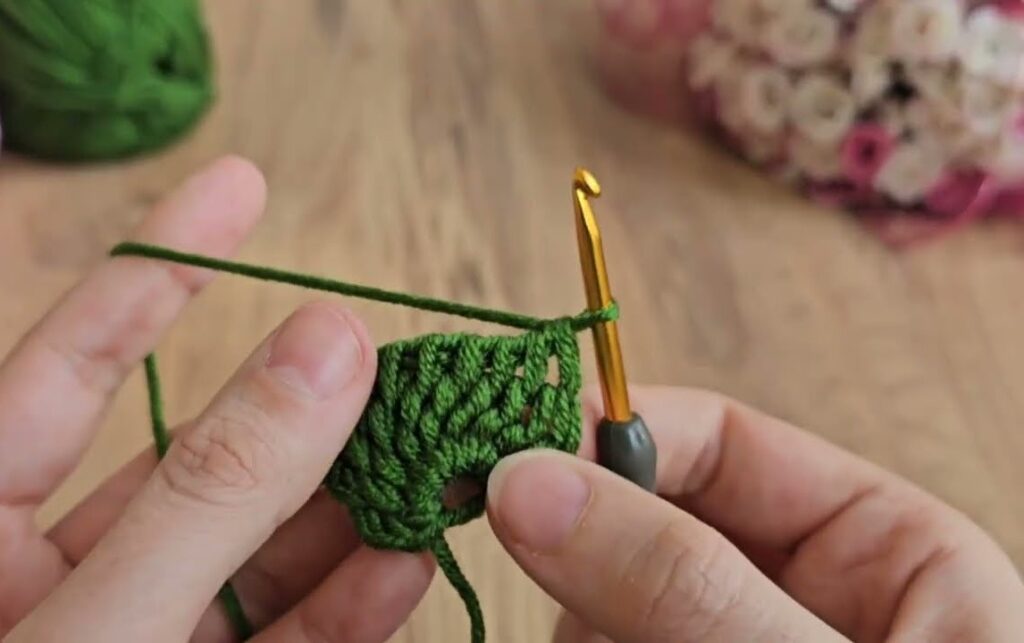
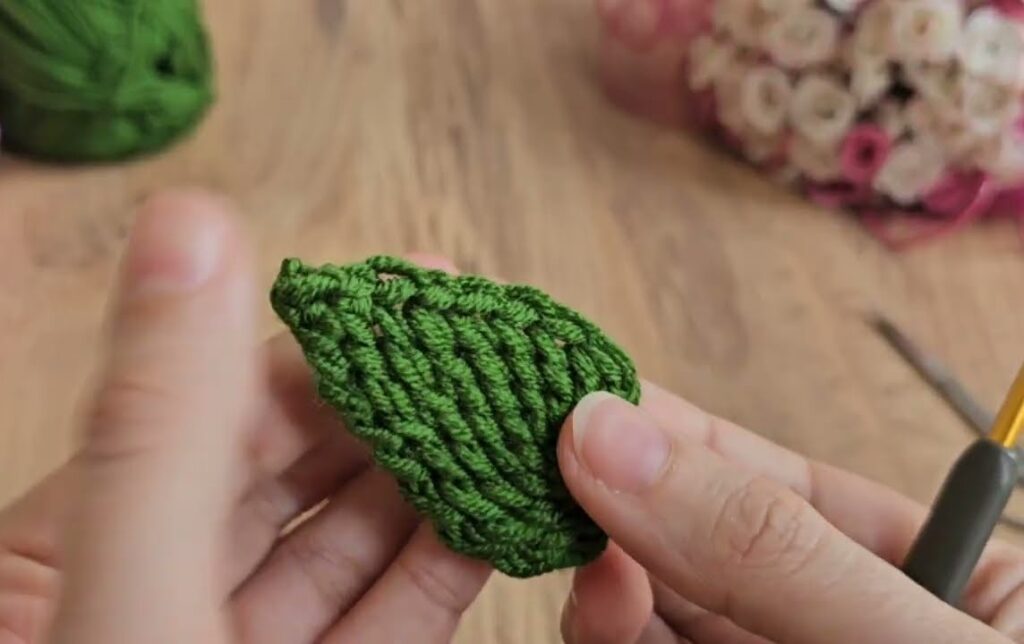
🍃 PART 4: Crochet Leaves
- Use green yarn.
- Chain 6.
- Starting in 2nd chain from hook:
sc, hdc, dc, hdc, sc - Chain 1, turn, work on the other side of the chain:
sc, hdc, dc, hdc, sc - Slip stitch to the beginning of the chain to close leaf.
- Fasten off and make 2–3 leaves per flower.
(Optional: You can chain 8 instead of 6 for longer leaves.)
🪡 PART 5: Assembly
- Arrange 2 or 3 green leaves behind the flower.
- Sew or glue them securely to the back.
- Sew 4–6 pearl beads in the center for decoration.
- Weave in all yarn ends neatly.
🔑 PART 6: Make Keychain or Ornament
For Keychain:
- Use hot glue or a needle and thread to attach a metal ring to the back of the flower.
- You can attach a small chain between the flower and ring for flexibility.
For Ornament:
- Attach a loop of yarn or ribbon at the top so you can hang it on a Christmas tree.
✨ Optional Ideas
- Use metallic gold yarn for the center for a festive shine.
- Spray lightly with fabric stiffener to help the petals hold shape.
- Combine multiple flowers to create a garland, wreath, or table centerpiece.