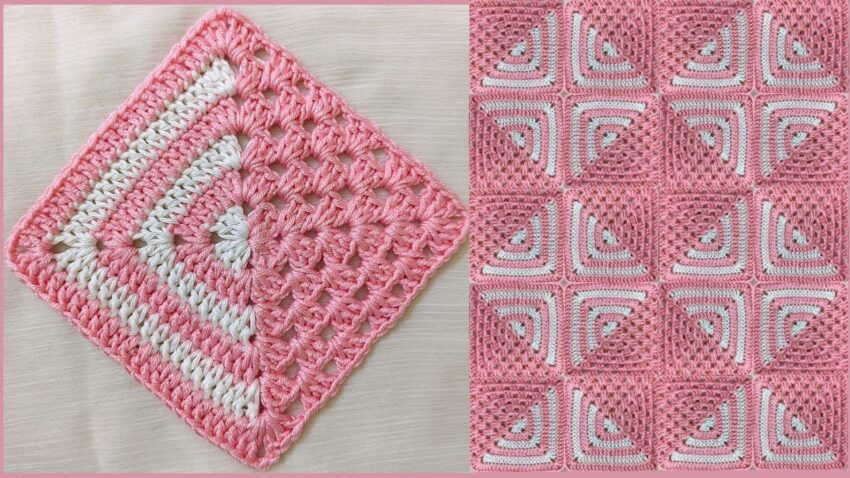
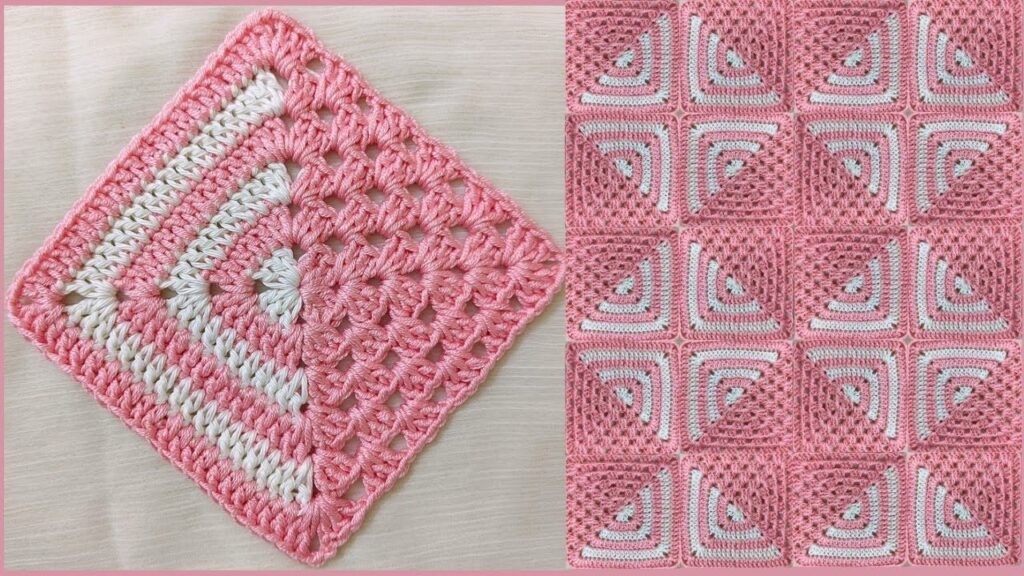
Perfect 🌸 — let’s go step-by-step so you can crochet the exact same square you showed (the half granny square or corner granny square motif), and then how to join them to create the blanket-like pattern in the image.
🧶 MATERIALS
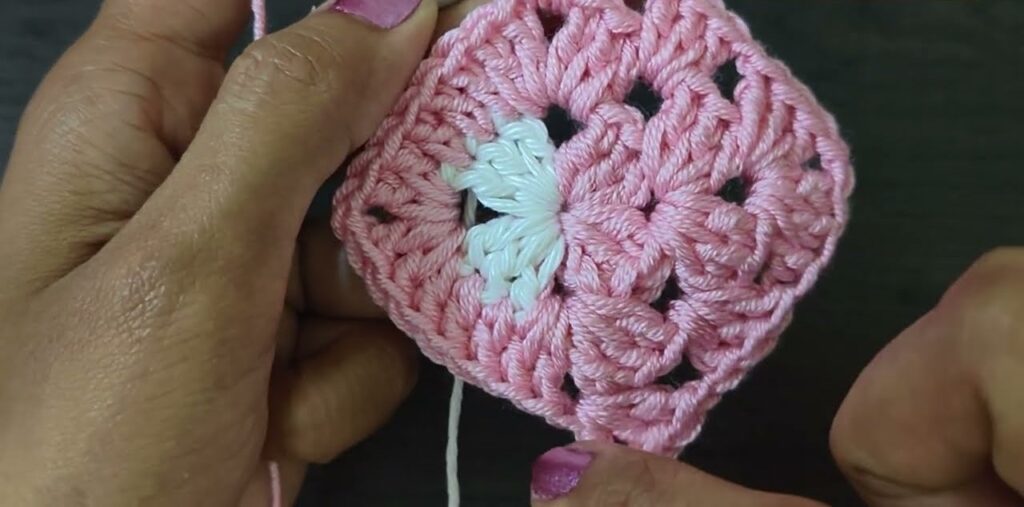
- Yarn: Two colors (Color A = white, Color B = pink)
- Hook: Size appropriate for your yarn (usually 4 mm or 5 mm)
- Scissors and Yarn needle for finishing
🪡 STITCHES USED
- ch = chain
- sl st = slip stitch
- dc = double crochet
- sp = space
- ch-2 sp = chain-2 space
🌸 PATTERN: Half Granny Square
We’ll make one “triangle” granny square that starts at one corner and grows outward.
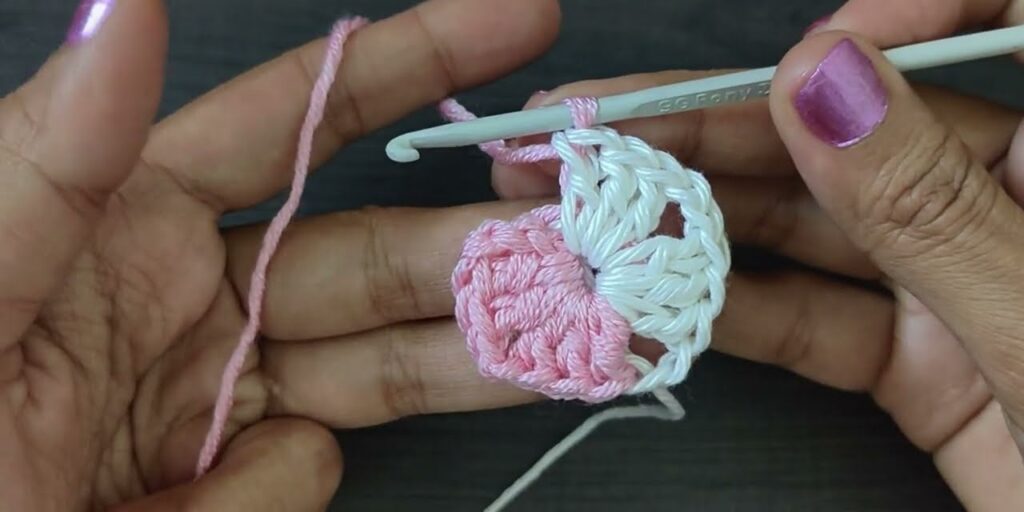
Round 1 (Start)
- With Color A, make a slip knot and chain 4.
- Join with a sl st into the first chain to form a ring.
- Chain 3 (counts as 1st dc).
- Work 2 dc into the ring.
- Ch 2 (this forms the corner).
- Work 3 dc into the ring again.
- Turn your work.
✅ You should have a small triangle with a “corner space” at the top.
Round 2
- Ch 3, 2 dc in the first space (the space between groups from last round).
- In the corner space (ch-2 sp), make (3 dc, ch 2, 3 dc).
- Work 3 dc in the last side space.
- Turn your work.
Now the triangle has 3 groups on each side.
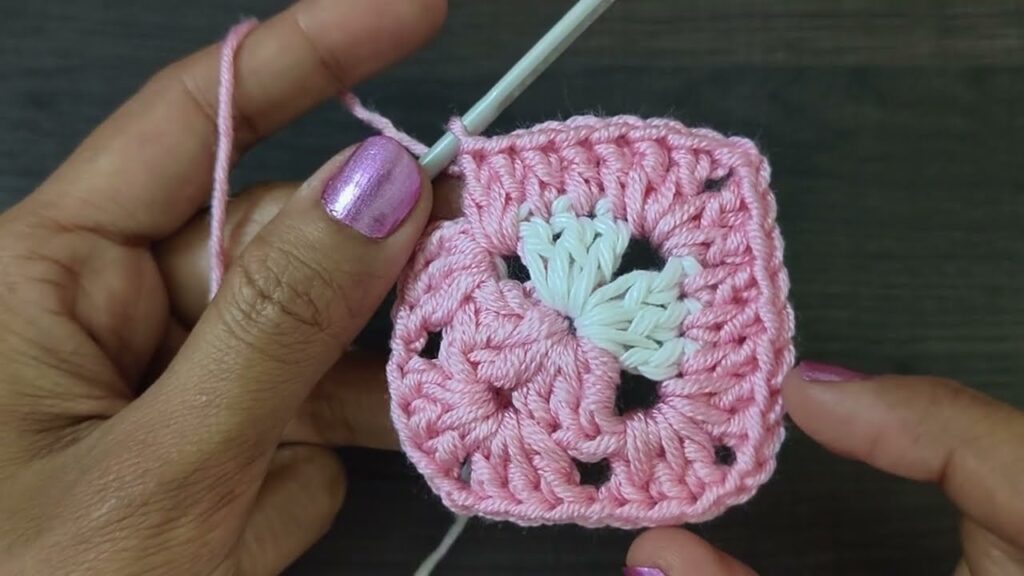
Round 3 (Change Color)
- Attach Color B in the beginning space.
- Ch 3, 2 dc in the same space.
- In each space along the edge, work 3 dc.
- In the corner space, make (3 dc, ch 2, 3 dc).
- Continue working 3 dc in each space down the other side.
- Turn your work.
Round 4 (Change back to Color A)
Repeat the same steps:
- Ch 3, 2 dc in the first space.
- (3 dc) in each side space.
- (3 dc, ch 2, 3 dc) in the corner space.
- (3 dc) in each remaining side space.
- Turn.
Continue Pattern
- Keep alternating colors (white → pink → white → pink).
- Each round adds one more “3 dc group” on each side of the triangle.
- The corner always has (3 dc, ch 2, 3 dc).
Keep working until the square is the size you want.
🧵 EDGING (Optional)
You can finish with a border:
- Join yarn at any edge.
- Work 1 round of single crochet evenly around.
- Add (sc, ch 2, sc) in each corner to keep it square.
🔷 JOINING THE SQUARES
When you have many squares:
- Rotate every other one so the corners face different directions (like the right side of your image).
- Join squares using one of these methods:
- Slip Stitch Join: Place squares right sides together, sl st through both loops.
- Whip Stitch Join: Sew with a yarn needle and matching yarn.
- Single Crochet Join: Place squares wrong sides together, sc through both edges.
💡 TIPS
- Always turn your work at the end of each row — this keeps the triangle shape even.
- Make sure your tension stays consistent.
- You can make a baby blanket, scarf, or pillow by joining multiple squares.