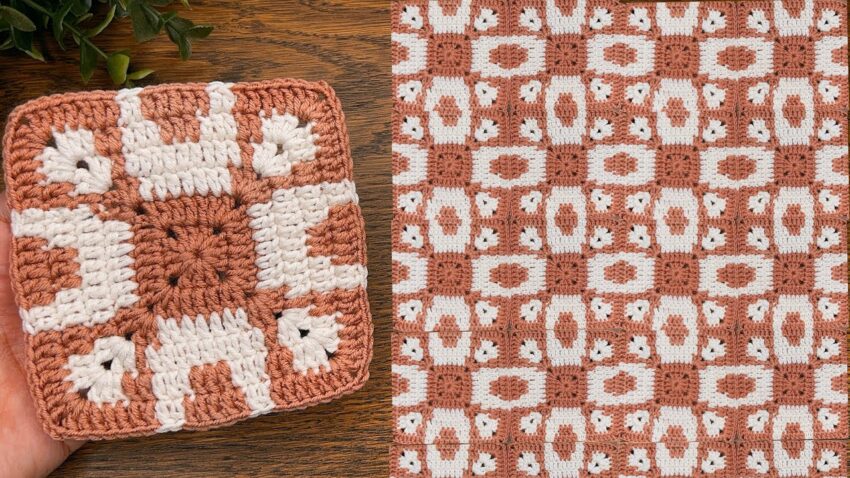
That’s a mosaic crochet granny square pattern — it creates a modern geometric look when joined together, like in the image on the right. I’ll guide you step-by-step to make one square like the one shown.
🧶 Pattern Name
Geometric Mosaic Granny Square
(uses overlay mosaic crochet technique)
🧵 Materials
- Yarn: Two contrasting colors (shown: Rust brown = Color A, White = Color B)
- Hook: 4.0 mm (or as fits yarn)
- Tapestry needle
- Scissors

🔸 Crochet Stitches Used
| Abbreviation | Stitch Name |
|---|---|
| ch | chain |
| sl st | slip stitch |
| sc | single crochet |
| dc | double crochet |
| fpdc | front post double crochet |
| sp | space |
| st | stitch |
🔶 Step-by-Step Instructions
🌿 Round 1 – Center Circle
- With Color A, make a magic ring.
- Ch 2 (counts as dc).
- Work 11 dc into the ring. (Total 12 dc.)
- Pull the ring tight.
- Sl st into the top of the beginning ch-2 to close.
- Fasten off A.
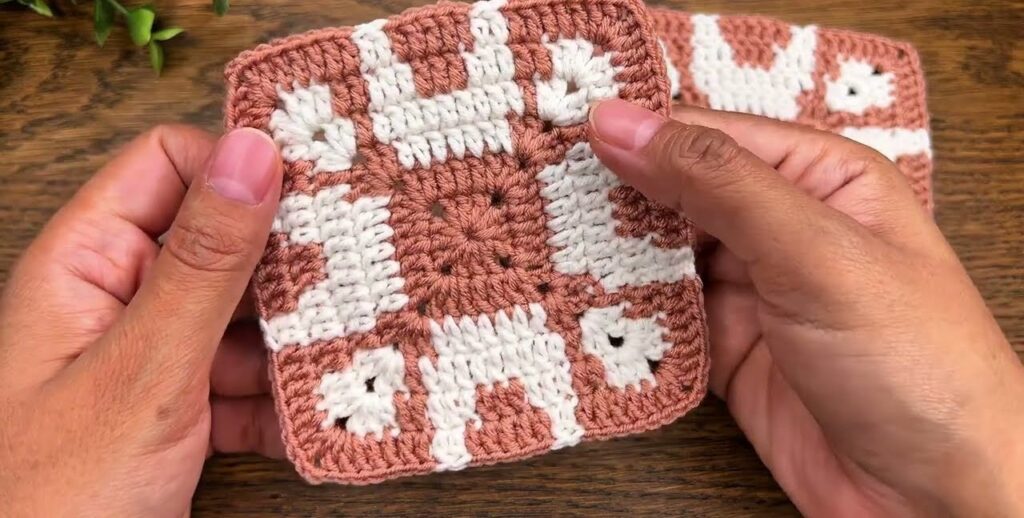
→ Tip: You now have a small solid circle — this is the square’s center.
🌼 Round 2 – Foundation for Corners
- Attach Color B in any stitch.
- Ch 3 (counts as dc), dc in same st.
- Ch 1, skip next st.
- (2 dc in next st, ch 1, skip next st) repeat around.
- Join with sl st to top of ch 3.
- (12 groups of 2 dc, separated by ch-1 spaces.)
→ Tip: This sets up the gaps that will become part of the pattern later.
🌸 Round 3 – Start Squaring the Circle
- Join Color A in any ch-1 space.
- (3 dc, ch 2, 3 dc) in same space (this is your first corner).
- (3 dc in next space) repeat twice.
- (3 dc, ch 2, 3 dc) in next space (corner), 3 dc in next 2 spaces.
- Repeat pattern until you have 4 corners.
- Join with sl st to first dc.
- Fasten off A.
Now your piece is turning square-shaped!

🧱 Round 4 – Mosaic Overlay Round (White Design)
- Join Color B in any corner ch-2 space.
- Ch 3 (counts as dc), 2 dc, ch 2, 3 dc (corner made).
- On next side: 1 dc in next 3 sts.
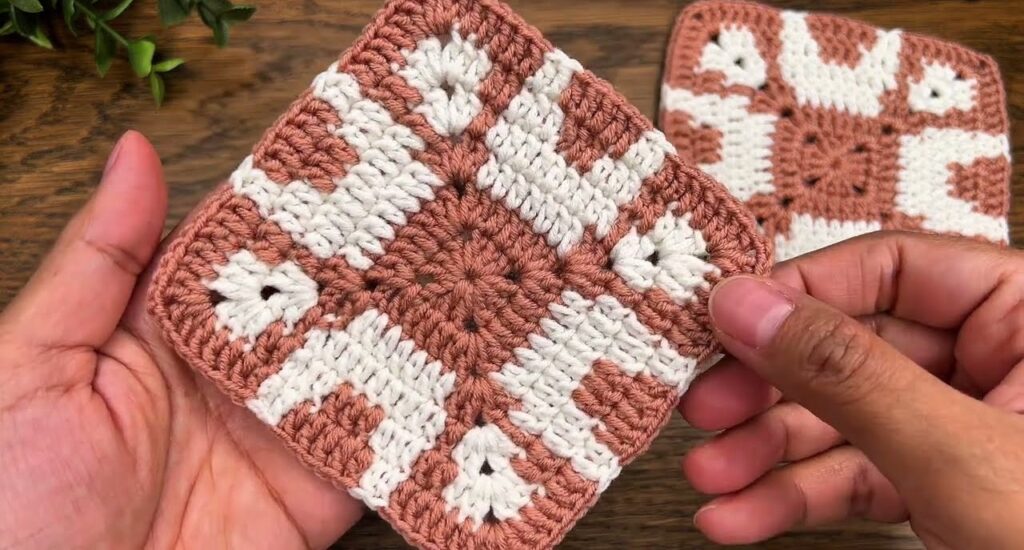
- Next, fpdc (front post dc) around the 2nd dc of the 3-dc group 2 rows below (Round 2). This creates the vertical white “stripe.”
- Continue pattern: 1 dc in each of next 2 sts, 1 fpdc around dc from 2 rows below.
- Repeat pattern along each side.
- In each corner: (3 dc, ch 2, 3 dc).
- Join to top of ch 3.
- Fasten off B.
→ Tip: The fpdc stitches create that contrasting mosaic “notch” effect you see in the photo.
🧡 Round 5 – Framing Border
- Join Color A in any corner.
- (3 dc, ch 2, 3 dc) in corner space.
- Dc in each stitch along sides.
- Join with sl st to the first dc.
- Fasten off, weave in ends neatly.
🪡 Joining Squares
When you have many squares:
- Lay them out in alternating directions to form the pattern (like your picture’s right side).
- Join using slip stitch join or whip stitch on the back side with Color A.
- Add a border: 1 row sc around entire blanket for a polished look.
🌟 Optional Border Pattern
To add an elegant frame:
- With main color, sc around.
- On corners: (sc, ch 2, sc).
- Add a final round of reverse sc (crab stitch) for a clean finish.