
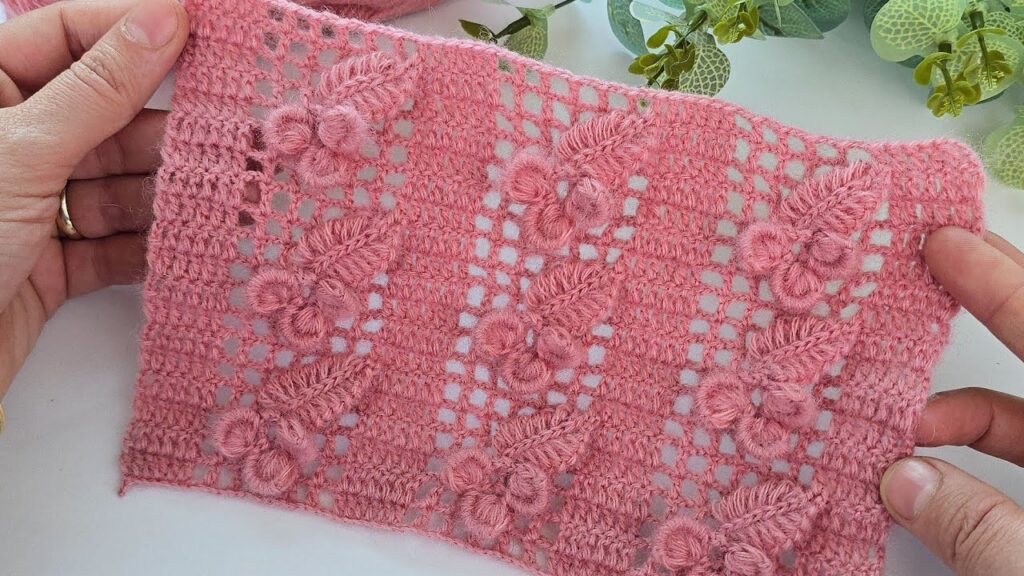
Perfect 🌸 — let’s go step-by-step so you can crochet the exact flower-and-leaf lace pattern like the one in your picture.
This is often called a 3D puff flower with leaf lace crochet pattern.
🧶 Materials
- Yarn: Medium or DK weight (light pink yarn like in the photo)
- Hook: 3.0 mm–3.5 mm
- Other: Scissors, tapestry needle
📏 Stitch Key
| Symbol | Stitch Name | Abbreviation |
|---|---|---|
| ch | Chain | ch |
| dc | Double crochet | dc |
| puff | Puff stitch (flower center) | puff |
| tr | Treble crochet | tr |
| ch sp | Chain space | — |
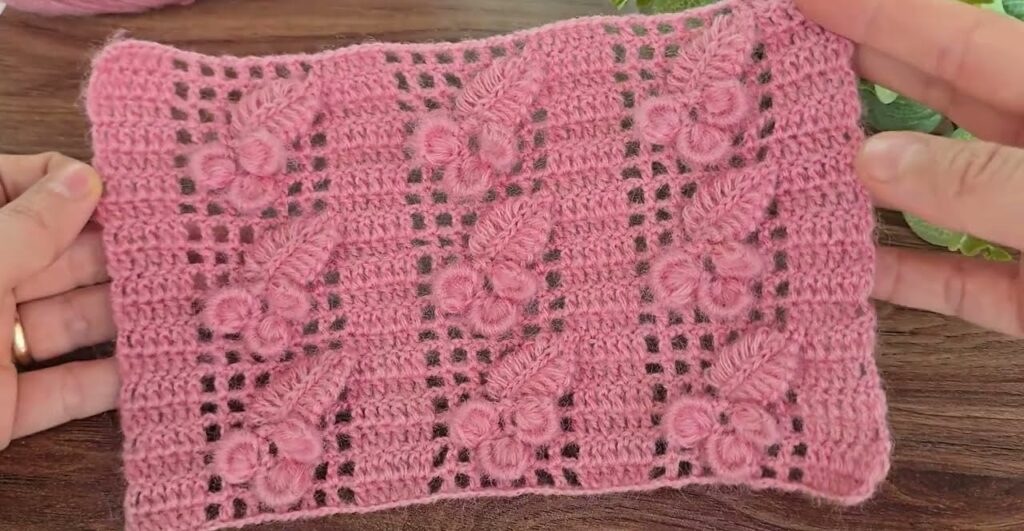
🌼 Pattern Construction
The piece alternates mesh columns (open grid) and columns of puff flowers with leaves.
🔹 Pattern repeat:
- Width: Multiple of 14 + 4 chains
- Height: Repeat rows 3–10 for pattern repeat.
🪡 Step-by-Step Pattern
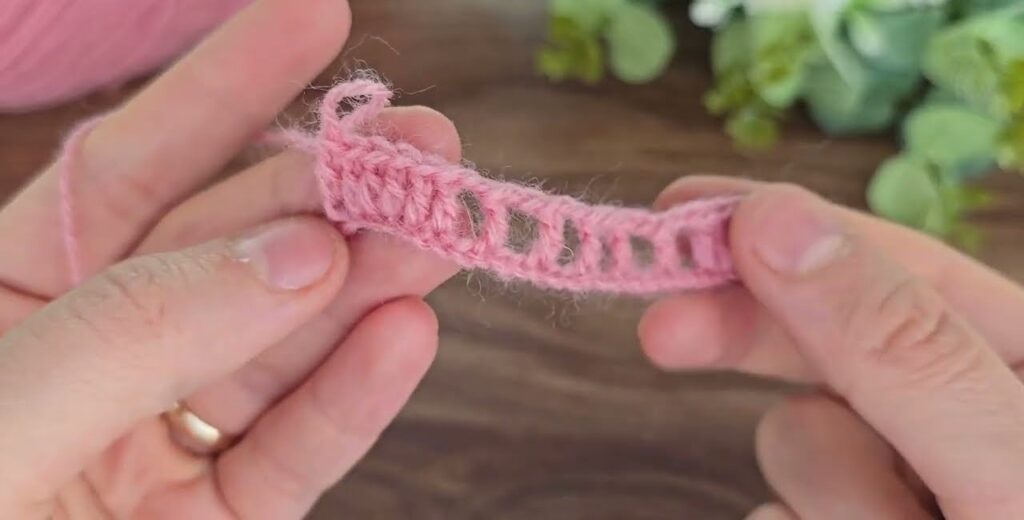
Row 1 – Foundation
Chain a multiple of 14 + 4 (for turning).
Example: 32 chains.
- In the 5th chain from hook, make 1 dc.
- Ch 1, skip 1 chain, 1 dc in next chain.
→ Repeat across the row.
This creates your first filet mesh.
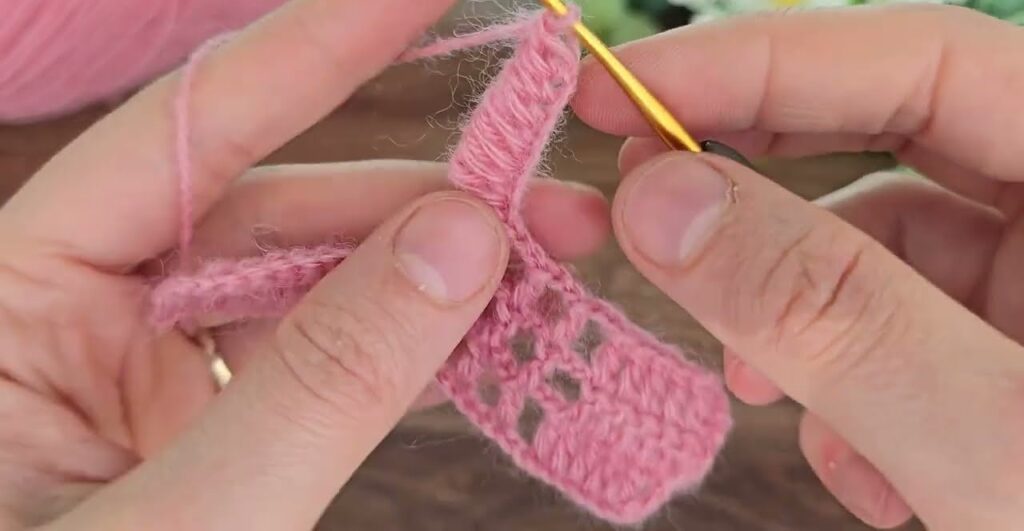
Row 2 – Mesh
- Ch 3 (counts as dc), ch 1, skip 1 space, dc in next dc across.
→ You have open square holes (mesh pattern).
Row 3 – Start First Puff Flower Row
- Ch 3 (counts as dc), dc in next dc.
- Ch 1, skip 1, dc in next dc until you reach where you want your flower column.
- In that ch space, work 1 puff stitch:
- (Yarn over, insert hook into space, pull up loop) × 4–5 times.
- Yarn over, pull through all loops, ch 1 to close.
- This forms your puff flower center.
- Continue with mesh (ch 1, dc, ch 1, dc) to end of row.
Row 4 – Mesh Row
- Work plain mesh (ch 1, skip 1, dc in next dc) across.
This gives a little space before the leaf row.
Row 5 – Leaf Row
- Ch 3 (counts as dc), dc in next dc.
- When you reach the puff stitch space below:
- Work leaf stitch on top of the puff:
- Yarn over, insert hook into puff space, pull up a tall loop (1.5 cm).
- Yarn over, pull through 2 loops.
- Repeat 4–5 times into same space.
- Yarn over, pull through all loops.
- Ch 1 to secure.
- This creates a tall textured leaf.
- Work leaf stitch on top of the puff:
- Continue with mesh stitches after leaf.
Row 6 – Mesh Row
- Same as Row 2.
Row 7 – Second Puff Flower Row
- Same as Row 3, but shift puff stitches vertically (align them in columns).
Row 8 – Mesh Row
Row 9 – Second Leaf Row
- Repeat the leaf stitch in same vertical column above puff stitches.
Row 10 – Mesh Row
🔁 Repeat Rows 3–10 for the full lace pattern.
🌷 Border Finishing
To make clean edges:
- After completing your lace, crochet 2 rows of double crochet on top and bottom.
- Optionally, add a single crochet edge all around.
✨ Tips for Best Results
- Loose tension for puff and leaf stitches = soft texture.
- Use blocking: wet your piece slightly and pin to shape flat.
- You can alternate the flower columns to make the pattern more balanced.
- This stitch is great for shawls, blankets, scarves, or cardigans.