
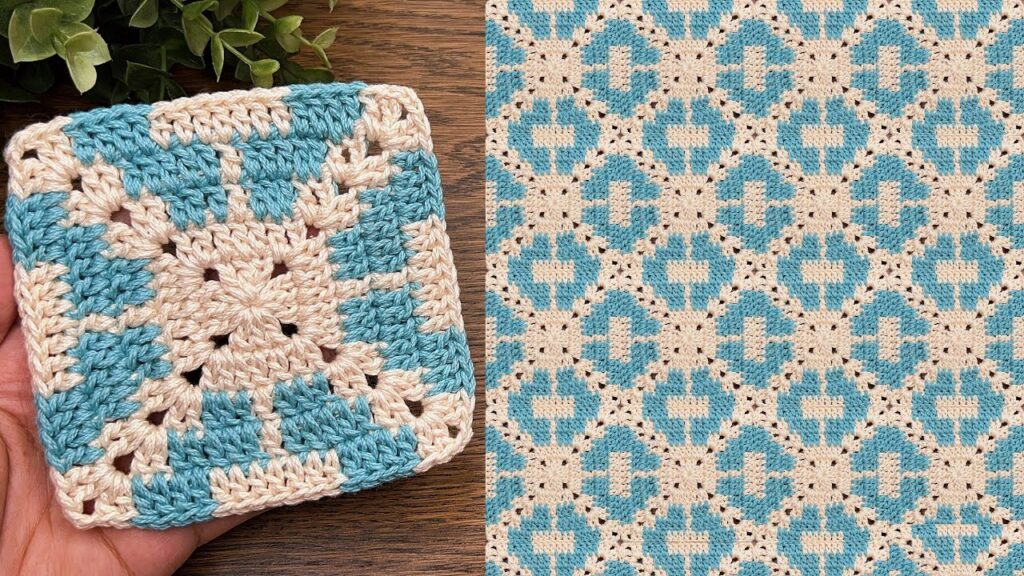
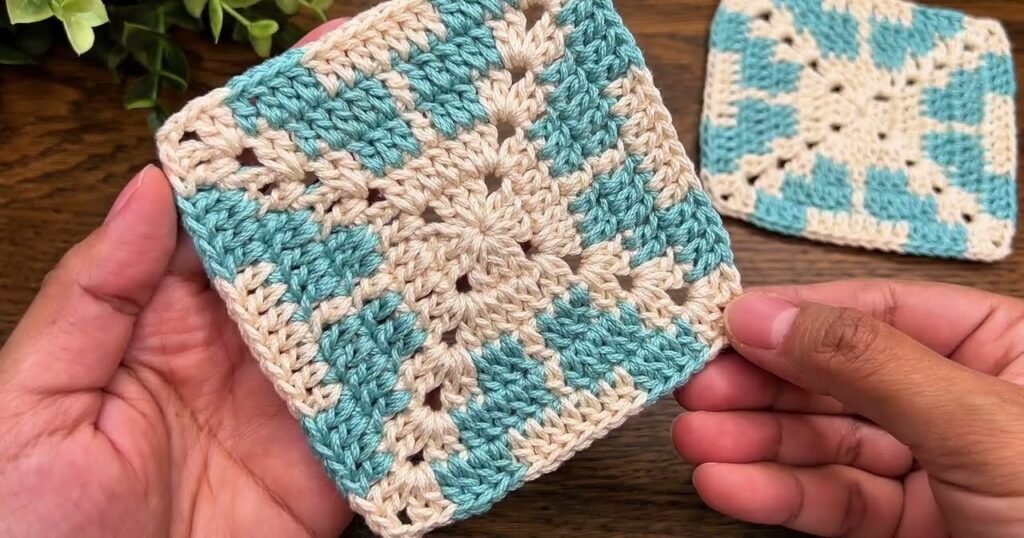
The image shows a crochet granny square pattern (on the left) and a joined blanket layout (on the right) made from those squares. It uses two colors — beige and turquoise — arranged in a geometric, mosaic-like design.
Here’s a simple step-by-step guide to make one square (like the one shown):
🧶 What You’ll Need
- Yarn: 2 colors (A = Beige/Cream, B = Teal/Blue) in medium (worsted/aran) weight.
- Hook: 4.0 mm or 4.5 mm crochet hook (adjust for your yarn).
- Other: Scissors, yarn needle, stitch markers (optional).
✨ Abbreviations (US Terms)
| Symbol | Meaning |
|---|---|
| ch | chain |
| sl st | slip stitch |
| sc | single crochet |
| dc | double crochet |
| sp | space |
| st | stitch |
| ch-sp | chain space |
Note: Ch-3 always counts as a dc.
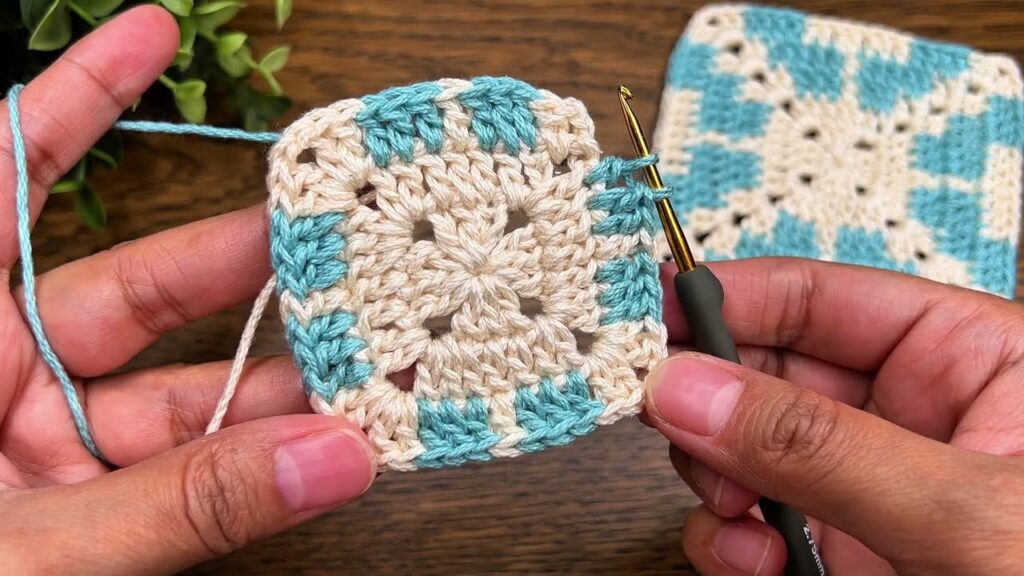
🌼 Detailed Pattern — One Square
Round 1 (Color A)
- Begin with a magic ring (or ch 4, sl st to form a ring).
- Ch 3 (counts as 1 dc).
- Work 2 dc, ch 2 — this forms the first corner.
- (3 dc, ch 2) — repeat 3 times (you’ll have 4 groups total).
- Join with sl st to top of starting ch-3.
➡ You should have: 4 corners made of (3 dc, ch 2).
Tighten the ring. Fasten off Color A.
Round 2 (Color B)
- Join Color B in any ch-2 sp.
- Ch 3 (counts as dc), 2 dc, ch 2, 3 dc (corner made).
- Ch 1.
- (3 dc, ch 2, 3 dc) in next corner, ch 1 — repeat around.
- Join with sl st to top of starting ch-3.
➡ Stitch count: 8 groups of 3 dc (4 corners + 4 sides).
Round 3 (Color A)
- Attach Color A in any ch-2 corner sp.
- Ch 3 (counts as dc), 2 dc, ch 2, 3 dc (corner).
- Ch 1, 3 dc in next ch-1 sp, ch 1.
- (3 dc, ch 2, 3 dc) in corner, ch 1, 3 dc in next ch-1 sp, ch 1 — repeat around.
- Join with sl st to top of ch-3.
➡ Each side now has 1 “middle” cluster.
Round 4 (Color B)
- Join B in any ch-2 corner sp.
- Ch 3, 2 dc, ch 2, 3 dc.
- Ch 1, 3 dc in next ch-1 sp, ch 1, 3 dc in next ch-1 sp, ch 1.
- Repeat around, placing (3 dc, ch 2, 3 dc) in each corner and 3-dc clusters separated by ch-1 on sides.
- Join with sl st.
➡ Each side now has 2 “middle” clusters.
Round 5 (Color A)
Same idea:
- Work (3 dc, ch 2, 3 dc) in corners.
- Work 3 dc in each ch-1 sp on sides, separated by ch-1.
- Continue alternating colors each round.
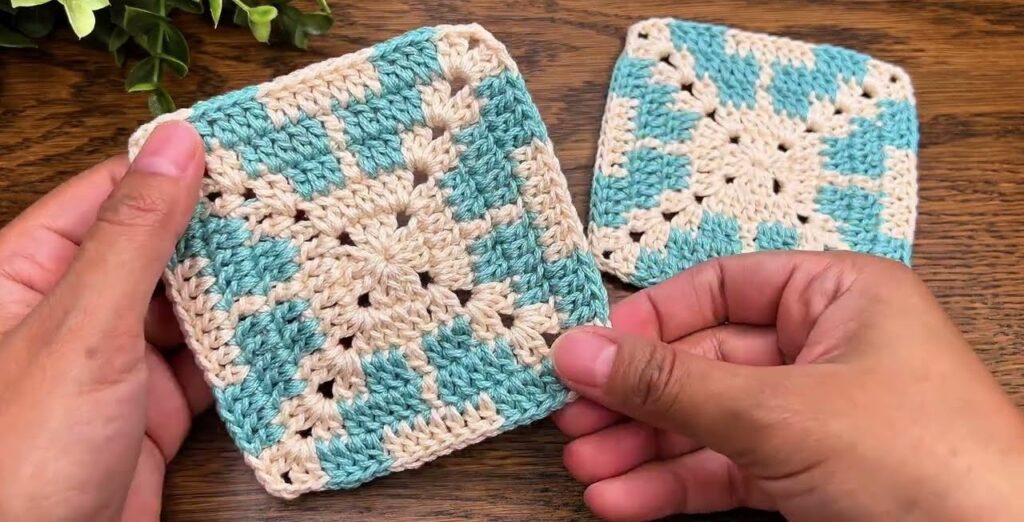
🎨 Color Layout Notes
- Always change color after completing a round.
- When switching colors, pull through the new color on the final slip stitch of the previous round for a neat join.
- Carry the unused color loosely up the back, or fasten off and re-join each round for a cleaner finish.
🧩 Joining Squares
Once you’ve made multiple squares:
Option 1: Join-As-You-Go (JAYGO)
- On the final round of each square, instead of chaining 1 between clusters, sl st into the adjacent square’s ch-1 space.
- This method is seamless and works beautifully with this pattern.
Option 2: Sewing or Slip Stitch Join
- Use Color A and whip stitch or slip stitch through the back loops of stitches between squares.
🔲 Border
After joining:
- With Color A, work one final border round: (3 dc, ch 2, 3 dc) in corners, and 3 dc in each ch-1 space along the edges.
- Add additional rounds or a decorative edge (like scallops or crab stitch) if desired.
💡 Tips
- Keep your tension consistent — loose stitches make joining easier.
- Block your squares before joining for an even, professional finish.
- Use stitch markers to hold corners aligned when joining.