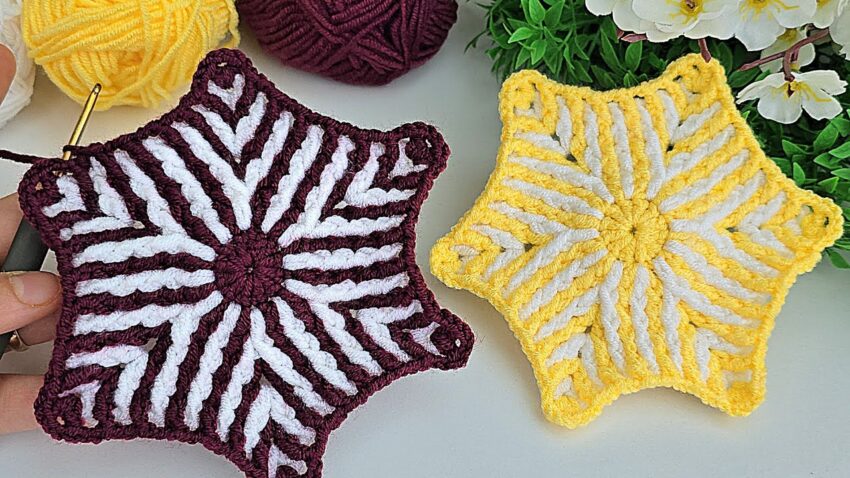
Those are crochet star motifs (6-pointed stars) made using the overlay crochet or front post stitch technique. Here’s how you can make one like in the picture (two-color pattern):
🧶 Materials You’ll Need:
- Yarn: 2 colors (Color A = white, Color B = contrast like yellow or maroon)
- Crochet hook: 3.0 mm or 3.5 mm
- Scissors
- Yarn needle
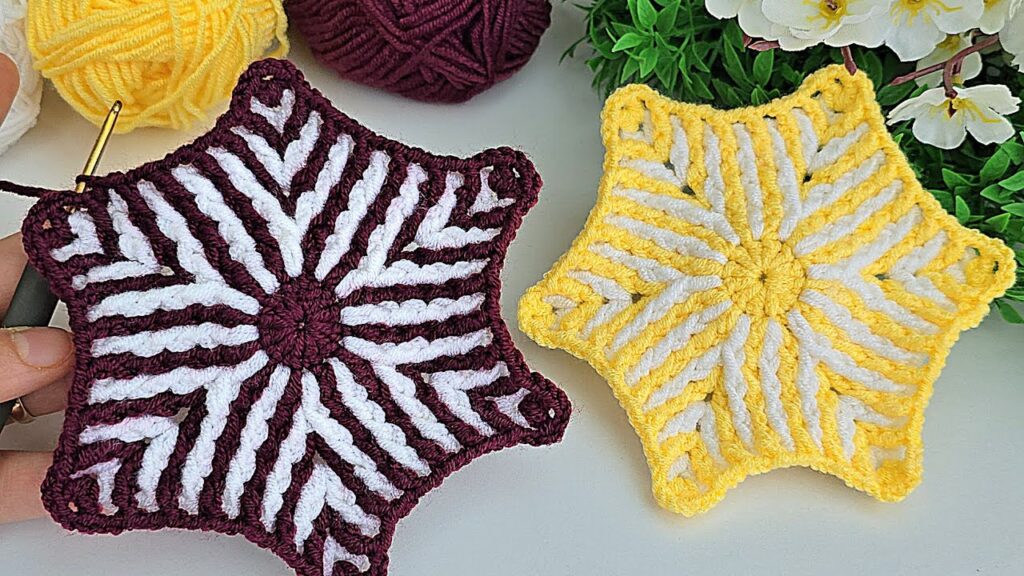
🌟 Step-by-Step Crochet Instructions
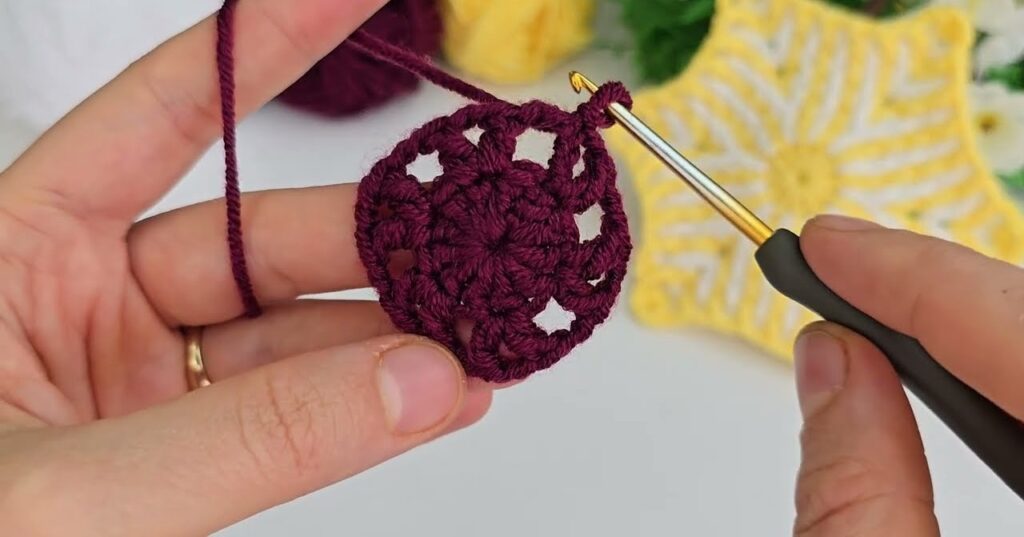
ROUND 1: The Center
- Make a magic ring (or chain 4 and join with slip stitch).
- Chain 2 (counts as your first double crochet).
- Crochet 11 more double crochets (dc) into the ring.
→ You will have 12 dc total. - Join with slip stitch to the top of the starting chain 2.
- Cut yarn if you want to switch to another color.
🧩 You now have a small circle (the center of your star).
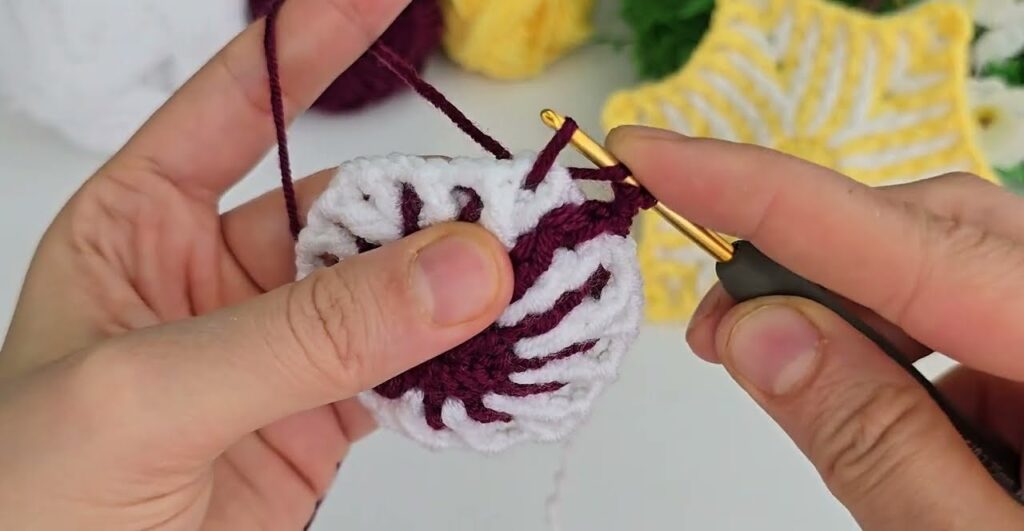
ROUND 2: Adding Texture
- Attach Color A (white) in any stitch.
- Chain 2 (counts as dc).
- Do 1 front post double crochet (FPdc) around next stitch.
- Then 1 double crochet (dc) in next stitch.
- Repeat (FPdc, dc) around the circle.
You will see little ridges forming.
- Join with slip stitch to the top of your first dc.
- (Optional) Change color.
ROUND 3: Start the Star Shape
- Chain 1.
- 1 single crochet (sc), 1 half double crochet (hdc), 3 double crochets (dc), 1 hdc, 1 sc — all in the next stitch.
→ This forms one point. - Slip stitch in the next stitch to anchor.
- Repeat the same sequence 6 times around (6 points total).
Each point will look like a petal or triangle.
Join with slip stitch to finish the round.
ROUND 4: Building the Overlay (the striped 3D lines)
Now use Color B (contrast color).
- Insert hook in the center circle.
- Chain 3 (counts as 1 treble crochet).
- Make front post treble crochet (FPtr) stitches going down into the stitches of Round 2.
→ You will alternate working in front post stitches and regular stitches to create the raised stripe pattern. - Continue this around each star point — the long treble stitches should reach into earlier rounds, forming that “V-shaped” raised texture.
- Join with slip stitch. Do not cut the yarn yet.
ROUND 5: Alternate Colors for More Texture
Switch to Color A (white).
- Chain 2.
- Work 1 dc in next stitch, then 1 FPdc in the next.
→ This will continue the “striped” 3D effect. - Follow the stitch pattern along each of the 6 points.
- Continue alternating colors every new round until your star reaches the desired size.
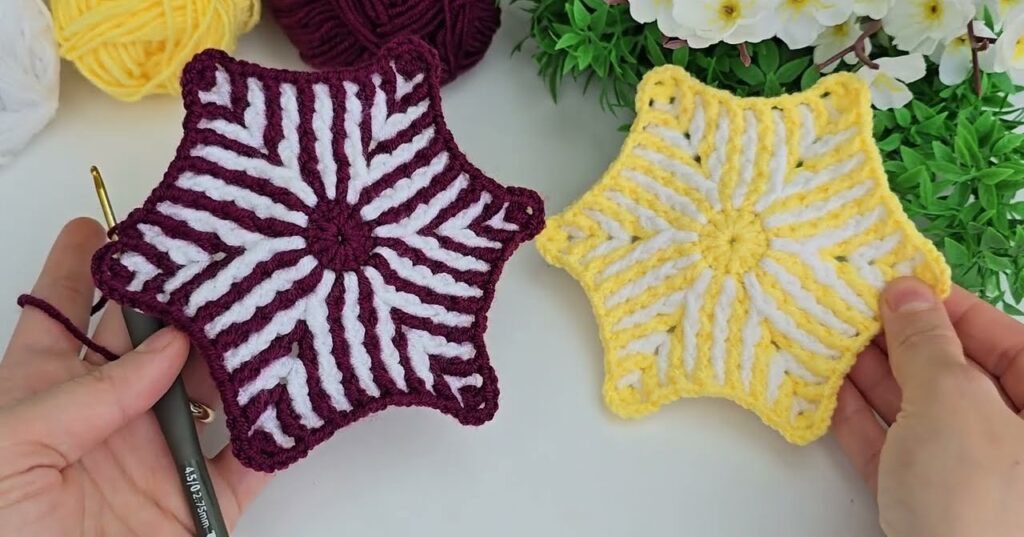
FINAL ROUND: Finishing Edge
- With your main color (yellow or maroon in the picture), work 1 round of single crochet all the way around the edges to clean up the shape.
- Slip stitch to finish.
- Cut yarn and weave in all loose ends with a needle.
🪄 Tips:
- Keep your tension even so the star doesn’t curl.
- You can block the piece (lightly wet, shape it flat, let it dry) for a perfect finish.
- This design can be used for:
- Coasters
- Table décor
- Joined together for blankets
