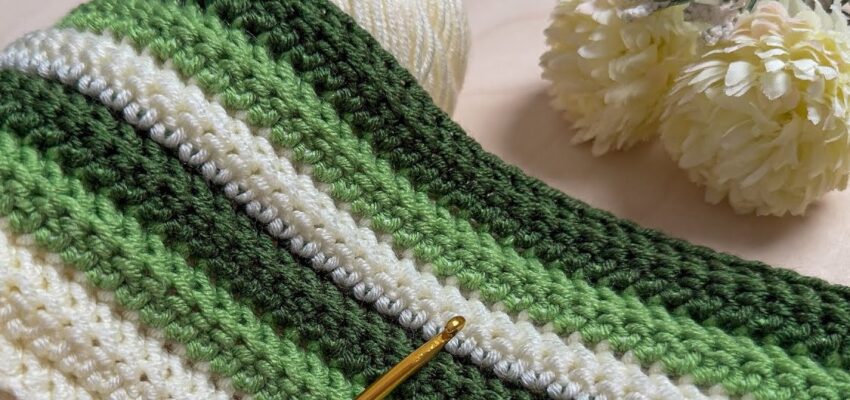
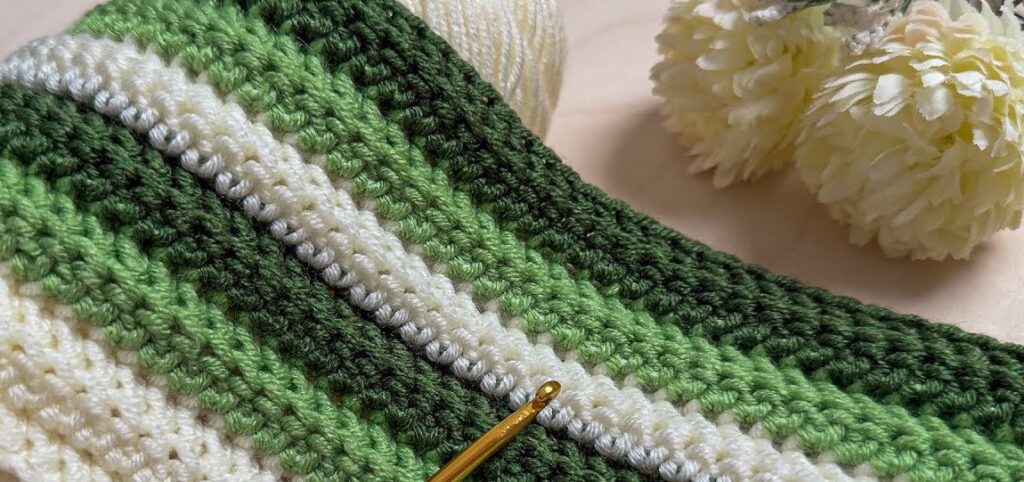
The crochet pattern in your image is a striped textured stitch made with alternating rows of front post and back post double crochet stitches, which creates a ribbed effect. Here’s how you can make it:
🧶 Materials Needed
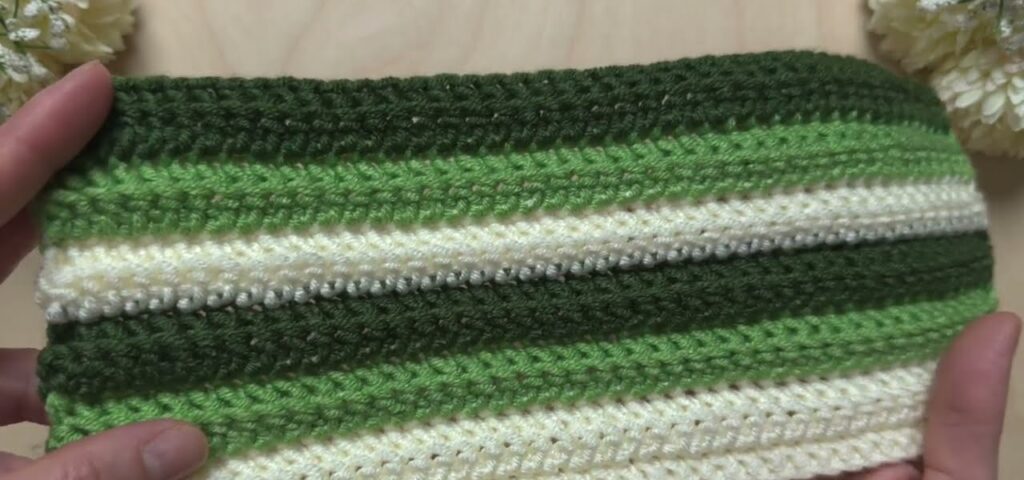
- Yarn: 3 colors (for example)
- Color A: White/Cream
- Color B: Light Green
- Color C: Dark Green
- Hook: 4.0 mm (G-6) or size recommended for your yarn
- Tapestry needle for weaving in ends
- Scissors
✨ Step-by-Step Instructions
🔹 Step 1: Make the Foundation Chain
- Chain any even number of stitches + 2 extra for turning.
Example: ch 32 + 2 = 34.
This gives you an even number of stitches to maintain the rib pattern.
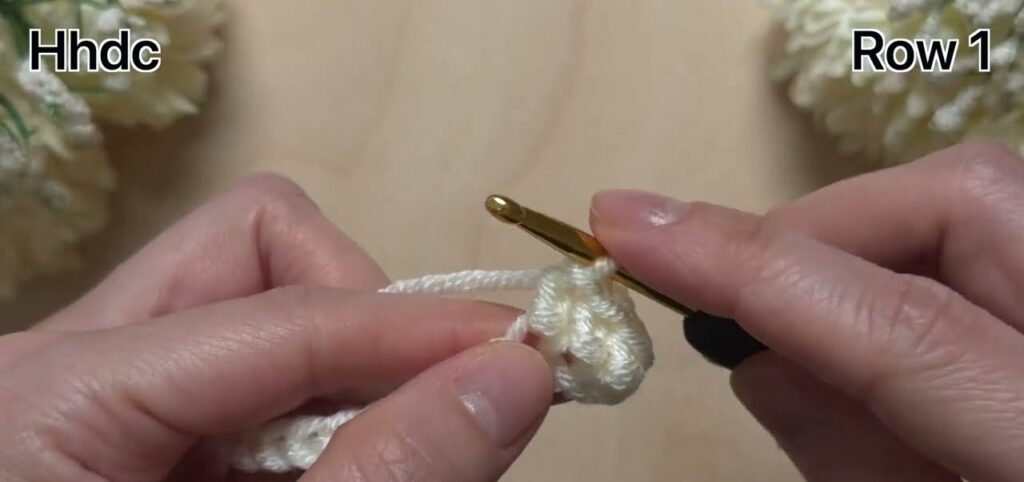
🔹 Step 2: Row 1 — Double Crochet Base
- Yarn over, insert your hook into the 3rd chain from hook.
- Make 1 double crochet (dc).
- Continue making dc across the entire chain.
- When you reach the end, chain 2 and turn.
👉 This row gives you a flat foundation to build texture on.
🔹 Step 3: Row 2 — Begin the Rib Texture
Now you’ll alternate front post and back post double crochets:
- Yarn over, insert your hook around the post (not top loops) of the first dc from the front to back to front — this is a Front Post Double Crochet (FPdc).
- The next stitch: insert hook from back to front to back — this is a Back Post Double Crochet (BPdc).
- Continue alternating: FPdc, BPdc, FPdc, BPdc… across the row.
- At the end, dc in the top of the turning chain, chain 2, and turn.
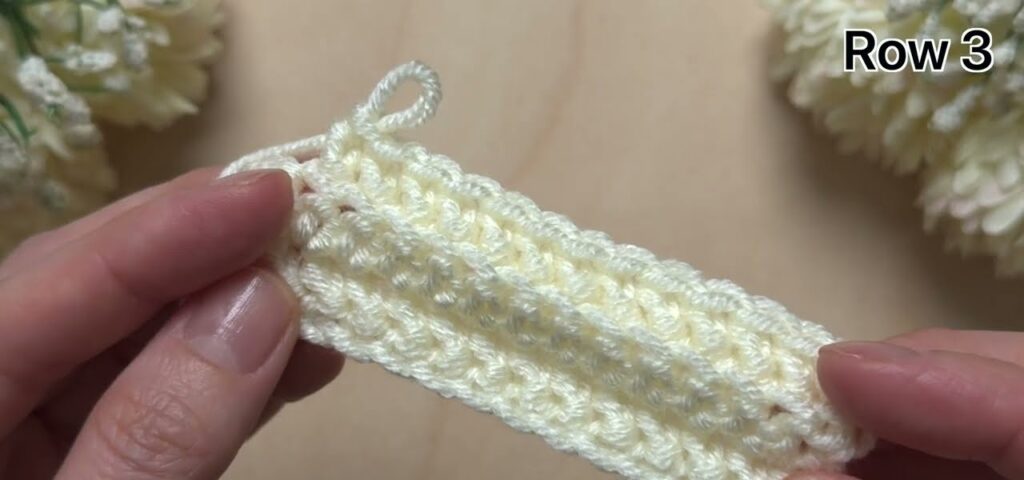
🔹 Step 4: Row 3 — Continue the Rib Pattern
To maintain the raised texture:
- Make FPdc into FPdc from the row below.
- Make BPdc into BPdc from the row below.
👉 This keeps the ribs lined up and gives the fabric a strong 3D texture.
Continue to the end, chain 2, turn.
🔹 Step 5: Row 4 & Beyond — Add Stripes
Now you can start changing colors to get the striped look like in your picture.
Color Pattern Example:
- Rows 1–2: Color A (white)
- Rows 3–4: Color B (light green)
- Rows 5–6: Color C (dark green)
- Repeat…
To Change Colors:
- On the last yarn over of the final dc in a row, drop your old color and pull through the new one.
- Continue crocheting with the new color.
🔹 Step 6: Keep Repeating
Repeat Rows 2–3 (the FPdc/BPdc pattern) while following your chosen color sequence until your piece reaches the desired length.
🔹 Step 7: Finish
- Fasten off your yarn and weave in all ends neatly with a tapestry needle.
- Optionally, add a border or edging using single crochet (sc) around.
🌿 Helpful Tips
- Tension: Keep it even; the post stitches can make fabric tight.
- Counting: If your stitch count gets off, check that each row starts and ends with a dc.
- Edges: For cleaner edges, always make your first FPdc/BPdc around the next post, not the turning chain.
- Look: The alternating post stitches create ridges — one side is raised, the other is indented.