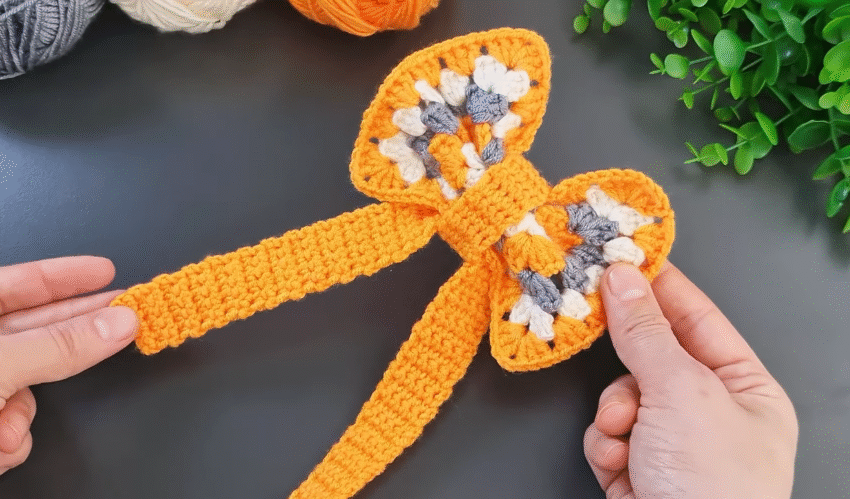
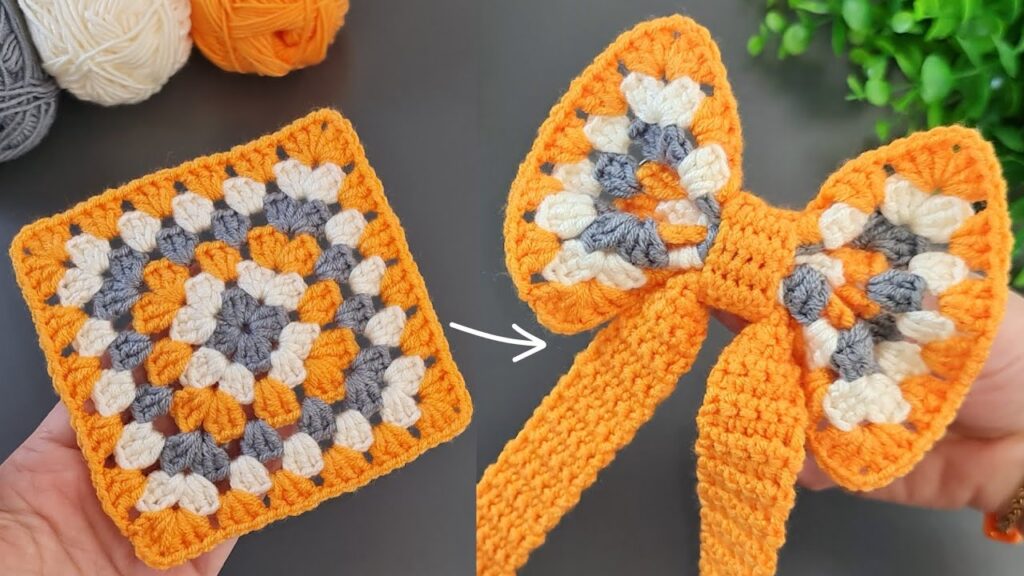
That’s a beautiful crochet bow accessory made using granny square hearts! I’ll walk you through how to crochet this exact bow, step by step. This accessory can be used for headbands, bags, or home decor.
🧶 What You’ll Need:
- Worsted weight yarn (3 or more colors)
- Crochet hook (3.5mm–4.0mm)
- Yarn needle
- Scissors
🎀 Step-by-Step Crochet Granny Square Bow Accessory
✅ Part 1: Make Two Heart-Shaped Granny Squares
Each “bow wing” is a granny heart.
Granny Heart Instructions:
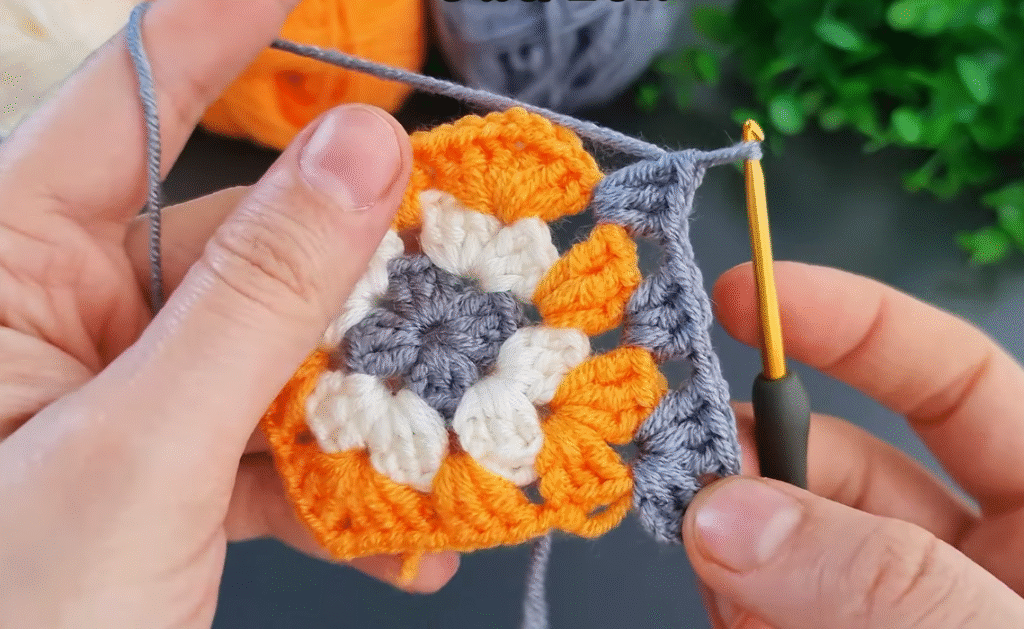
- Round 1:
- Magic ring.
- Ch 3 (counts as dc), 2 dc into ring, ch 2.
- (3 dc, ch 2) × 3 more times.
- Join with sl st. You now have a 4-corner mini square.
- Round 2:
- In each ch-2 corner: (3 dc, ch 2, 3 dc)
- Between corners: 3 dc in the space.
- You now have a full granny square.
- Turn it into a heart shape:
- From the top middle of the square, crochet:
- Into one corner: (3 dc, 3 tr, 3 dc) — creates the rounded part.
- Down one side: 3 hdc, 2 sc
- At bottom: sl st or picot
- Up the other side: 2 sc, 3 hdc
- Into the last corner: repeat (3 dc, 3 tr, 3 dc)
- From the top middle of the square, crochet:
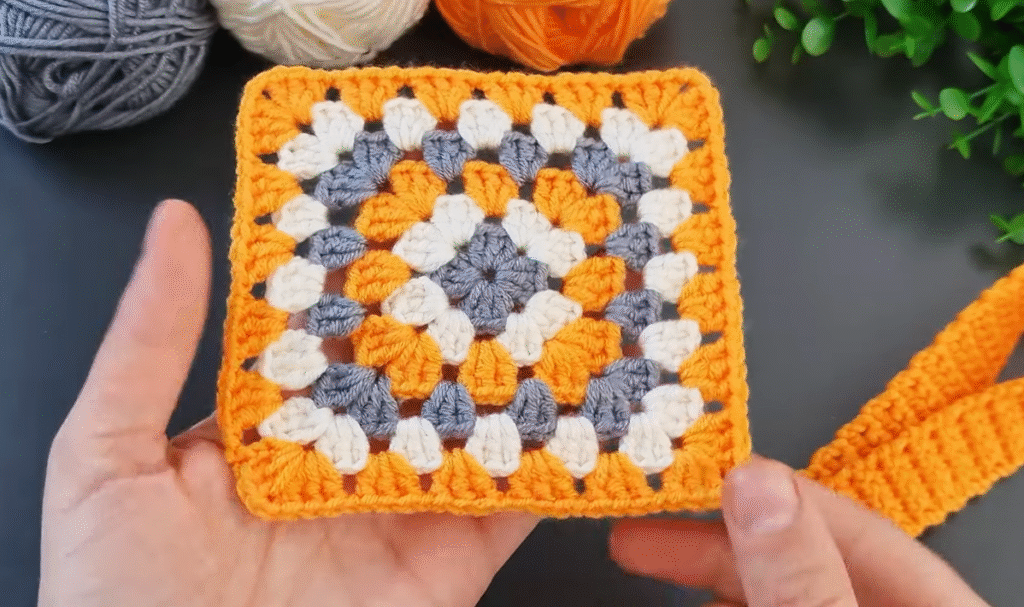
Now you have a heart-shaped granny square. Make 2 of them.
✅ Part 2: Make the Bow Tails (Long Band)
- Foundation Row:
- Ch 51 (or longer if you want longer tails)
- Row 1:
- Sc in 2nd ch from hook and across (50 sc)
- Row 2–6:
- Ch 1, turn, sc in each stitch across.
You now have a long, narrow strip.
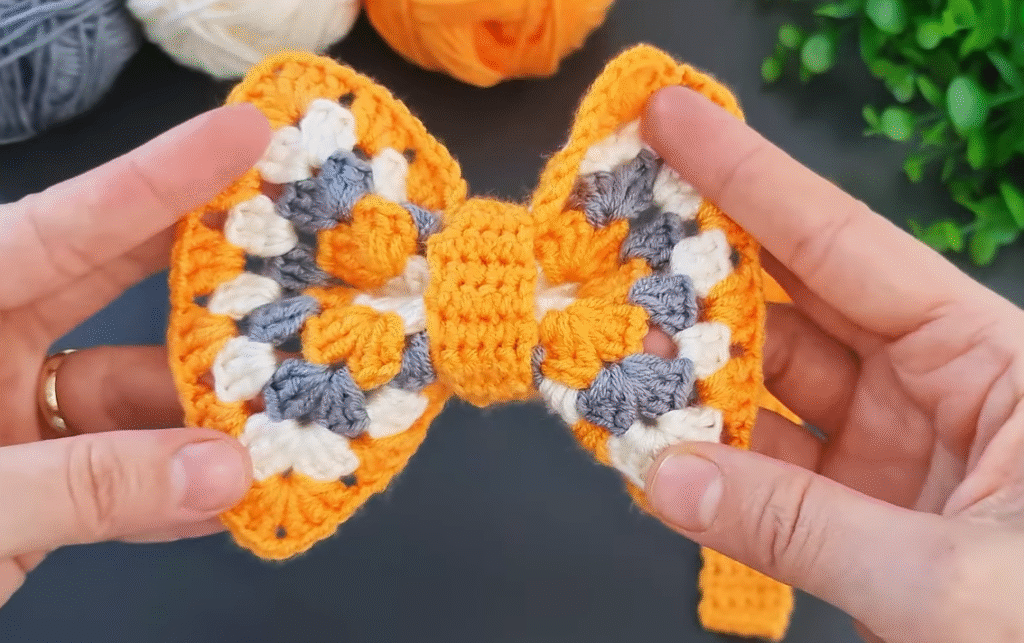
✅ Part 3: Assemble the Bow
- Place both heart squares with the pointed ends facing outward (they form the two sides of the bow).
- Lay the band behind them, centered, so the ends drape down like ribbon tails.
- Use a small strip (6 sc wide x 4 rows) to:
- Wrap around the middle where all parts meet.
- Sew the strip closed in the back to form the bow’s “knot.”
🧵 Finishing Touches:
- Weave in all ends securely.
- Block the hearts lightly to shape if needed.

Video tutorial : How to crochet bow accessories with granny squares