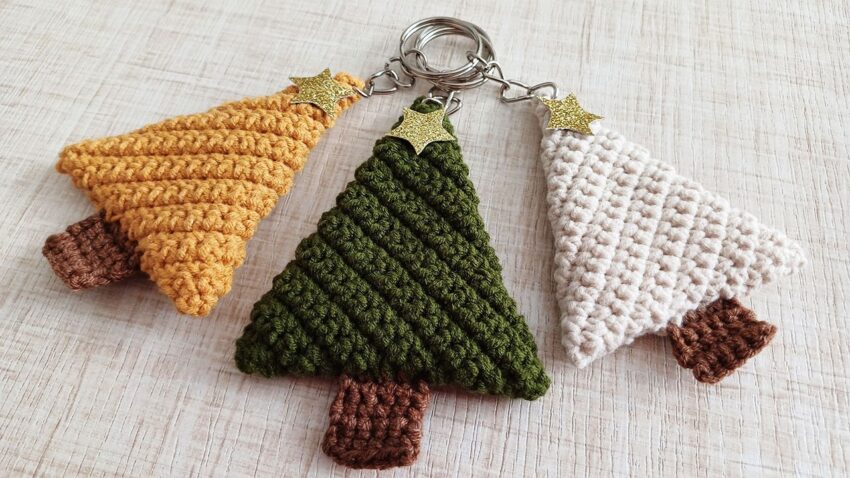
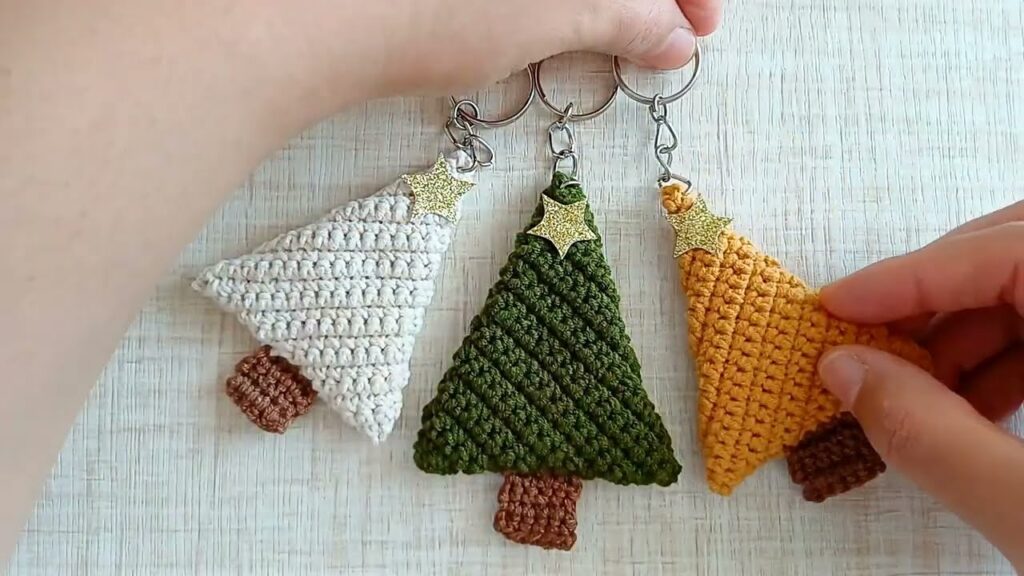
That’s a lovely crochet project! The image shows crocheted Christmas tree keychains — small triangular trees with a star on top and a brown trunk at the bottom. Here’s how to make one:
🎄 Crochet Christmas Tree Keychain (Detailed Tutorial)
🧶 Materials
- Yarn: Worsted weight (medium #4)
- Tree color: Green / Yellow / White (as in the photo)
- Trunk: Brown
- Star: Gold felt or glitter foam
- Hook: 3.0 mm or 3.5 mm crochet hook
- Stuffing: Polyester fiberfill (a small pinch)
- Tools: Yarn needle, scissors, keychain ring, glue (optional for star)

🌲 TREE (Make 2 identical pieces)
We’ll crochet two flat triangle panels and join them together.
Step 1 — Start the base
- Chain 2.
- In 2nd chain from hook, make 2 single crochets (sc).
→ (2 stitches total)
Step 2 — Build the triangle shape
From here, you’ll increase by 1 stitch each row to form a triangle.
- Row 2: Chain 1, turn.
Work 2 sc in first stitch, 1 sc in next.
→ (3 stitches) - Row 3: Chain 1, turn.
2 sc in first stitch, 1 sc in each remaining stitch.
→ (4 stitches) - Continue this pattern:
- Chain 1, turn.
- 2 sc in first stitch.
- 1 sc in each remaining stitch.
→ You’ll have about 17 rows total.
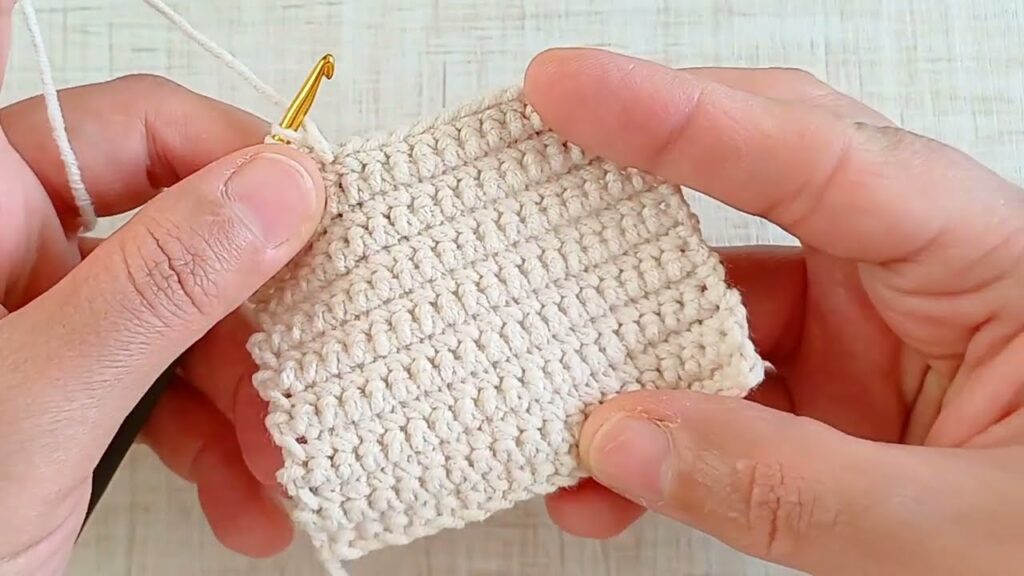
Step 3 — Add texture (optional but beautiful)
To get the ribbed ridges like in the photo:
- Work each row in the back loop only (BLO) instead of both loops.
This creates those diagonal lines.
When you reach your final row (18 stitches wide), fasten off and cut the yarn, leaving a long tail for joining later.
Make two identical triangles.
🌳 TREE TRUNK
- With brown yarn, chain 5.
- In 2nd chain from hook, make 1 sc in each chain across.
→ (4 stitches) - Chain 1, turn. Work 1 sc in each stitch.
- Repeat for 4 more rows (total of 5 rows).
This forms a small rectangle.
Fasten off and leave a long tail for sewing.
🪡 ASSEMBLY
- Place the two tree triangles together, matching edges.
- With matching yarn (green/yellow/white), join at the bottom corner and start crocheting around the edges with single crochet (sc) stitches:
- Insert hook through both layers.
- Pull yarn through and sc across all edges.
- When ¾ of the tree is closed, stuff lightly with a small amount of fiberfill to give it shape (don’t overfill).
- Continue crocheting around to close the remaining edge.
- Sew or crochet the brown trunk onto the center bottom of the tree.
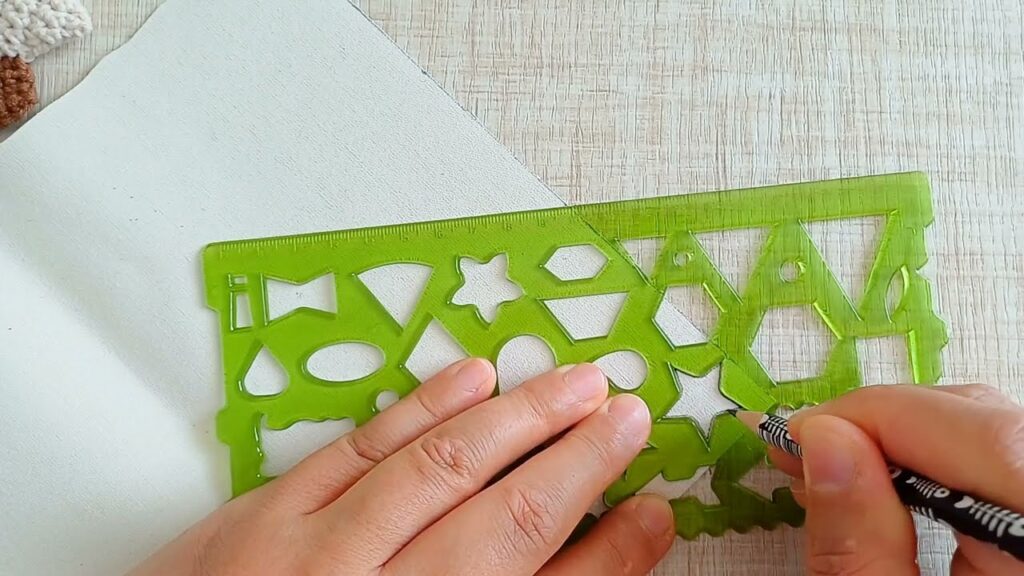
⭐ STAR & KEYCHAIN
- Cut a small star shape from gold glitter foam or felt.
- Glue or sew it on top of the tree tip.
- Using a yarn loop or a small metal jump ring, attach a keychain ring at the top.
🌈 Optional Decorations
- Add tiny beads or sequins as ornaments.
- Use metallic thread for sparkle.
- Crochet a mini star instead of using felt.
📏 Finished Size
Each tree will measure about 7–8 cm tall (without keyring) depending on your yarn and hook size.