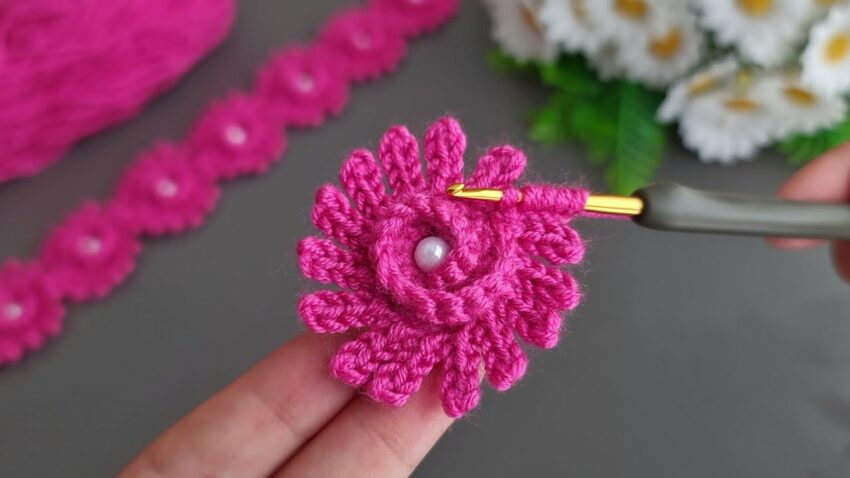
That’s a crochet flower with looped petals and a bead center — a beautiful decorative motif often used for headbands, accessories, or edging. Here’s a detailed step-by-step tutorial to make it:
🌺 Crochet Loop Petal Flower – Full Detailed Tutorial
🧵 Materials
- Yarn: Medium-weight cotton or acrylic (pink in photo)
- Hook: 2.5 mm – 3.5 mm (depending on yarn thickness)
- Bead or pearl for the center
- Scissors and yarn needle

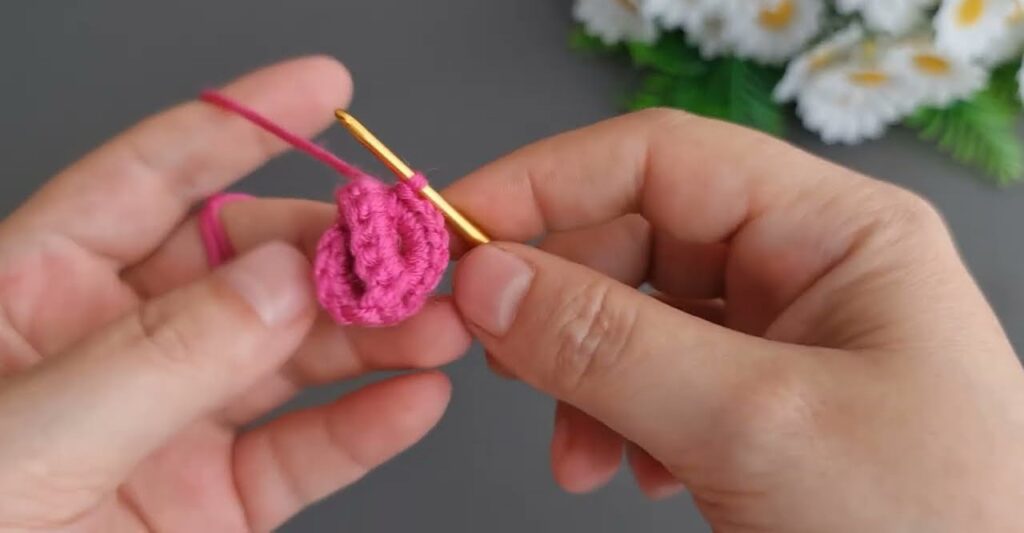
🔹 Step 1: Make the Flower Center
- Magic Ring:
- Wrap the yarn around two fingers to create a loop.
- Insert hook into the loop, yarn over, pull up a loop.
- Chain 1 to secure the loop.
- Round 1:
- Crochet 6 single crochets (sc) into the magic ring.
- Pull the tail to tighten the ring.
- Join with a slip stitch (sl st) to the first sc.
→ You now have a small round base (6 stitches total).
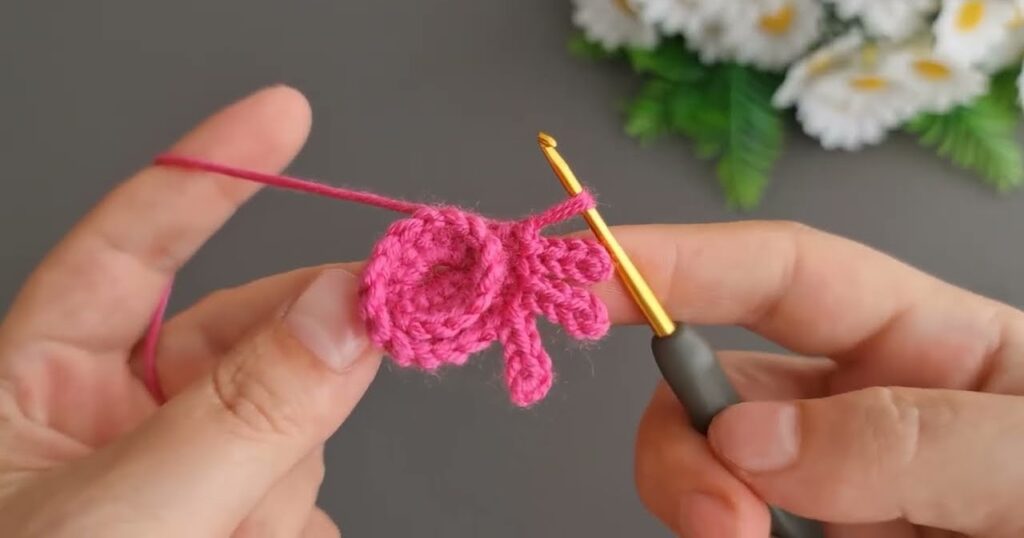
🔹 Step 2: Create the First Petal Layer (Short Loops)
- Start Loops:
- Chain 10 (this creates the first loop).
- Slip stitch (sl st) into the next stitch of the round to anchor it.
- Repeat this in every stitch around:
→ [ch 10, sl st into next stitch] around the circle. - You’ll get 6 loop petals around the center.
- End Round:
- After the last loop, slip stitch into the base of the first loop to close the round.
- Don’t cut yarn — we’ll build the next layer on top.
🔹 Step 3: Second Petal Layer (Longer Loops)
Now you’ll work behind the first layer.
- Turn your flower slightly and insert your hook into the back loop or behind each stitch base (where you made the first petals).
- Chain 12 (slightly longer for the second layer).
- Slip stitch into the next back loop stitch.
- Repeat: [ch 12, sl st into next back loop] around.
→ This gives you 6 new, larger loop petals behind the first layer.
🔹 Step 4: Optional – Third Petal Layer (Extra Fullness)
If you want your flower to be fuller (like a chrysanthemum):
- Work one more layer behind the second layer.
- Chain 14 or 16 for each loop petal.
- Slip stitch into the next base stitch behind.
→ You’ll get 6–8 large outer petals.
🔹 Step 5: Add the Pearl Bead Center
- Thread your yarn needle with a small piece of yarn or sewing thread.
- Place a pearl bead in the center.
- Secure it by sewing through the center hole and knotting behind the flower.
🔹 Step 6: Finish the Flower
- Cut the yarn leaving a small tail.
- Pull through the last loop and tighten.
- Use your yarn needle to weave in all loose ends at the back.
- Gently spread and arrange each loop petal evenly with your fingers.
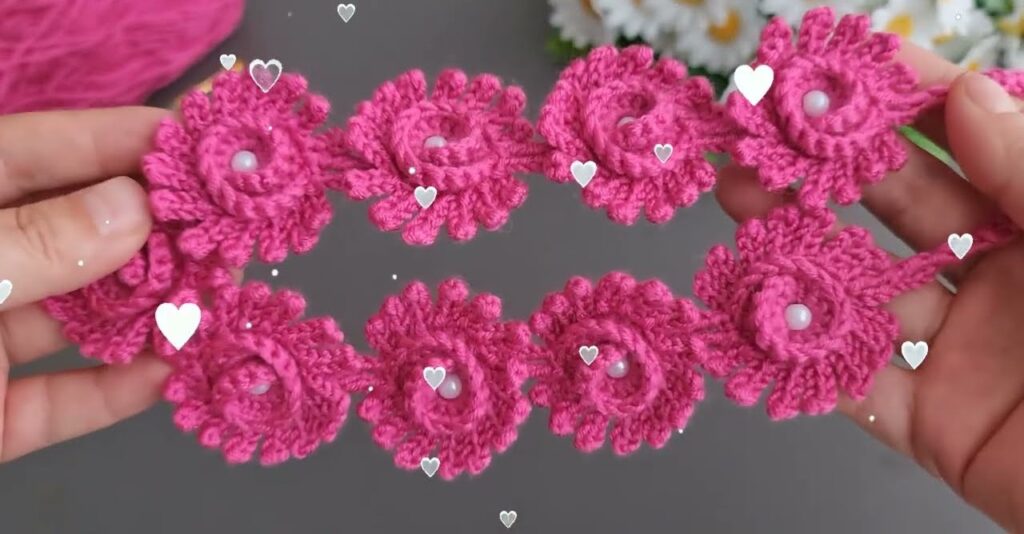
🌸 Optional – Make a Flower Chain (as seen in background)
- Crochet the first flower completely.
- Start the next flower by chaining 8–10 stitches from the previous one.
- Repeat the entire flower pattern, attaching it by slip stitch to the last chain.
- Continue to make a connected flower trim or garland.
✅ Tips
- Keep your chain loops uniform in length for neat petals.
- For a smaller flower, use fewer chains (like 8 or 9 for petals).
- For a larger flower, add an extra petal layer and increase chain length.
- Use a stiffer yarn or apply light fabric stiffener to keep petals perky.